Make A Karo Step Quilt
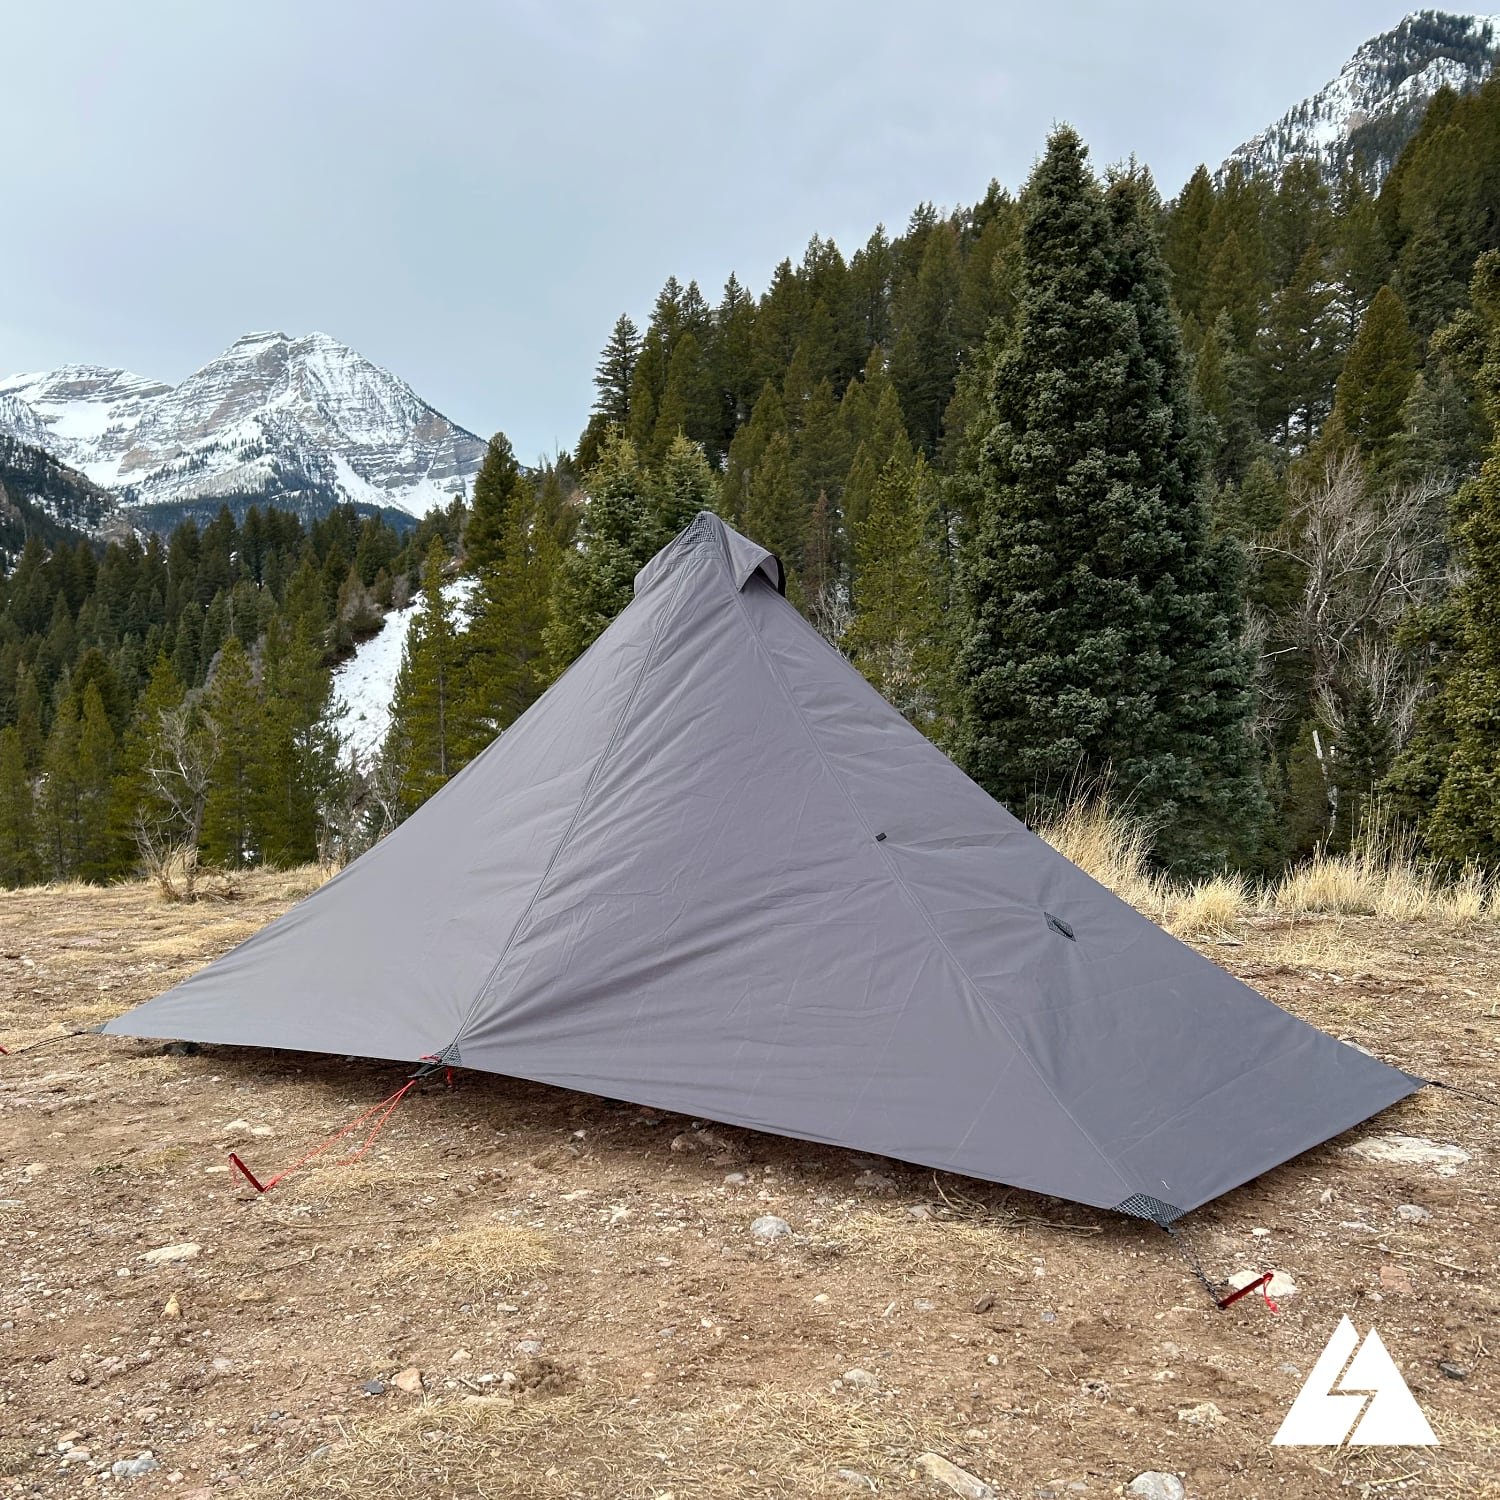
This article will go over the steps I used to make a Karo Step baffle quilt. This style backpacking quilt has been gaining in popularity with MYOG'ers, so when I decided I needed a new quilt for this summers adventures, I decided to the give the Karo Step method a try. I will discuss the process I used to assemble the quilt. I'll also talk about what went well, and things I would have done differently.
Quilt baffles
For those who are unfamiliar, here is a quick overview of baffles in general, and Karo Step baffles specifically. Down insulation consists of individual plumes that need to be held in place inside the quilt, otherwise it would end up in clumps in the corners of the quilt. The quilt must be divided up into compartments which hold the down and keep it from moving around too much. The simplest way to do this is called “Sewn Through” construction.

With sewn through construction the inner and outer layers of the quilt are stitched together to form compartments for the down. This has the advantage of being lightweight, but because there is no insulation at the location of the stitching, cold spots develop.
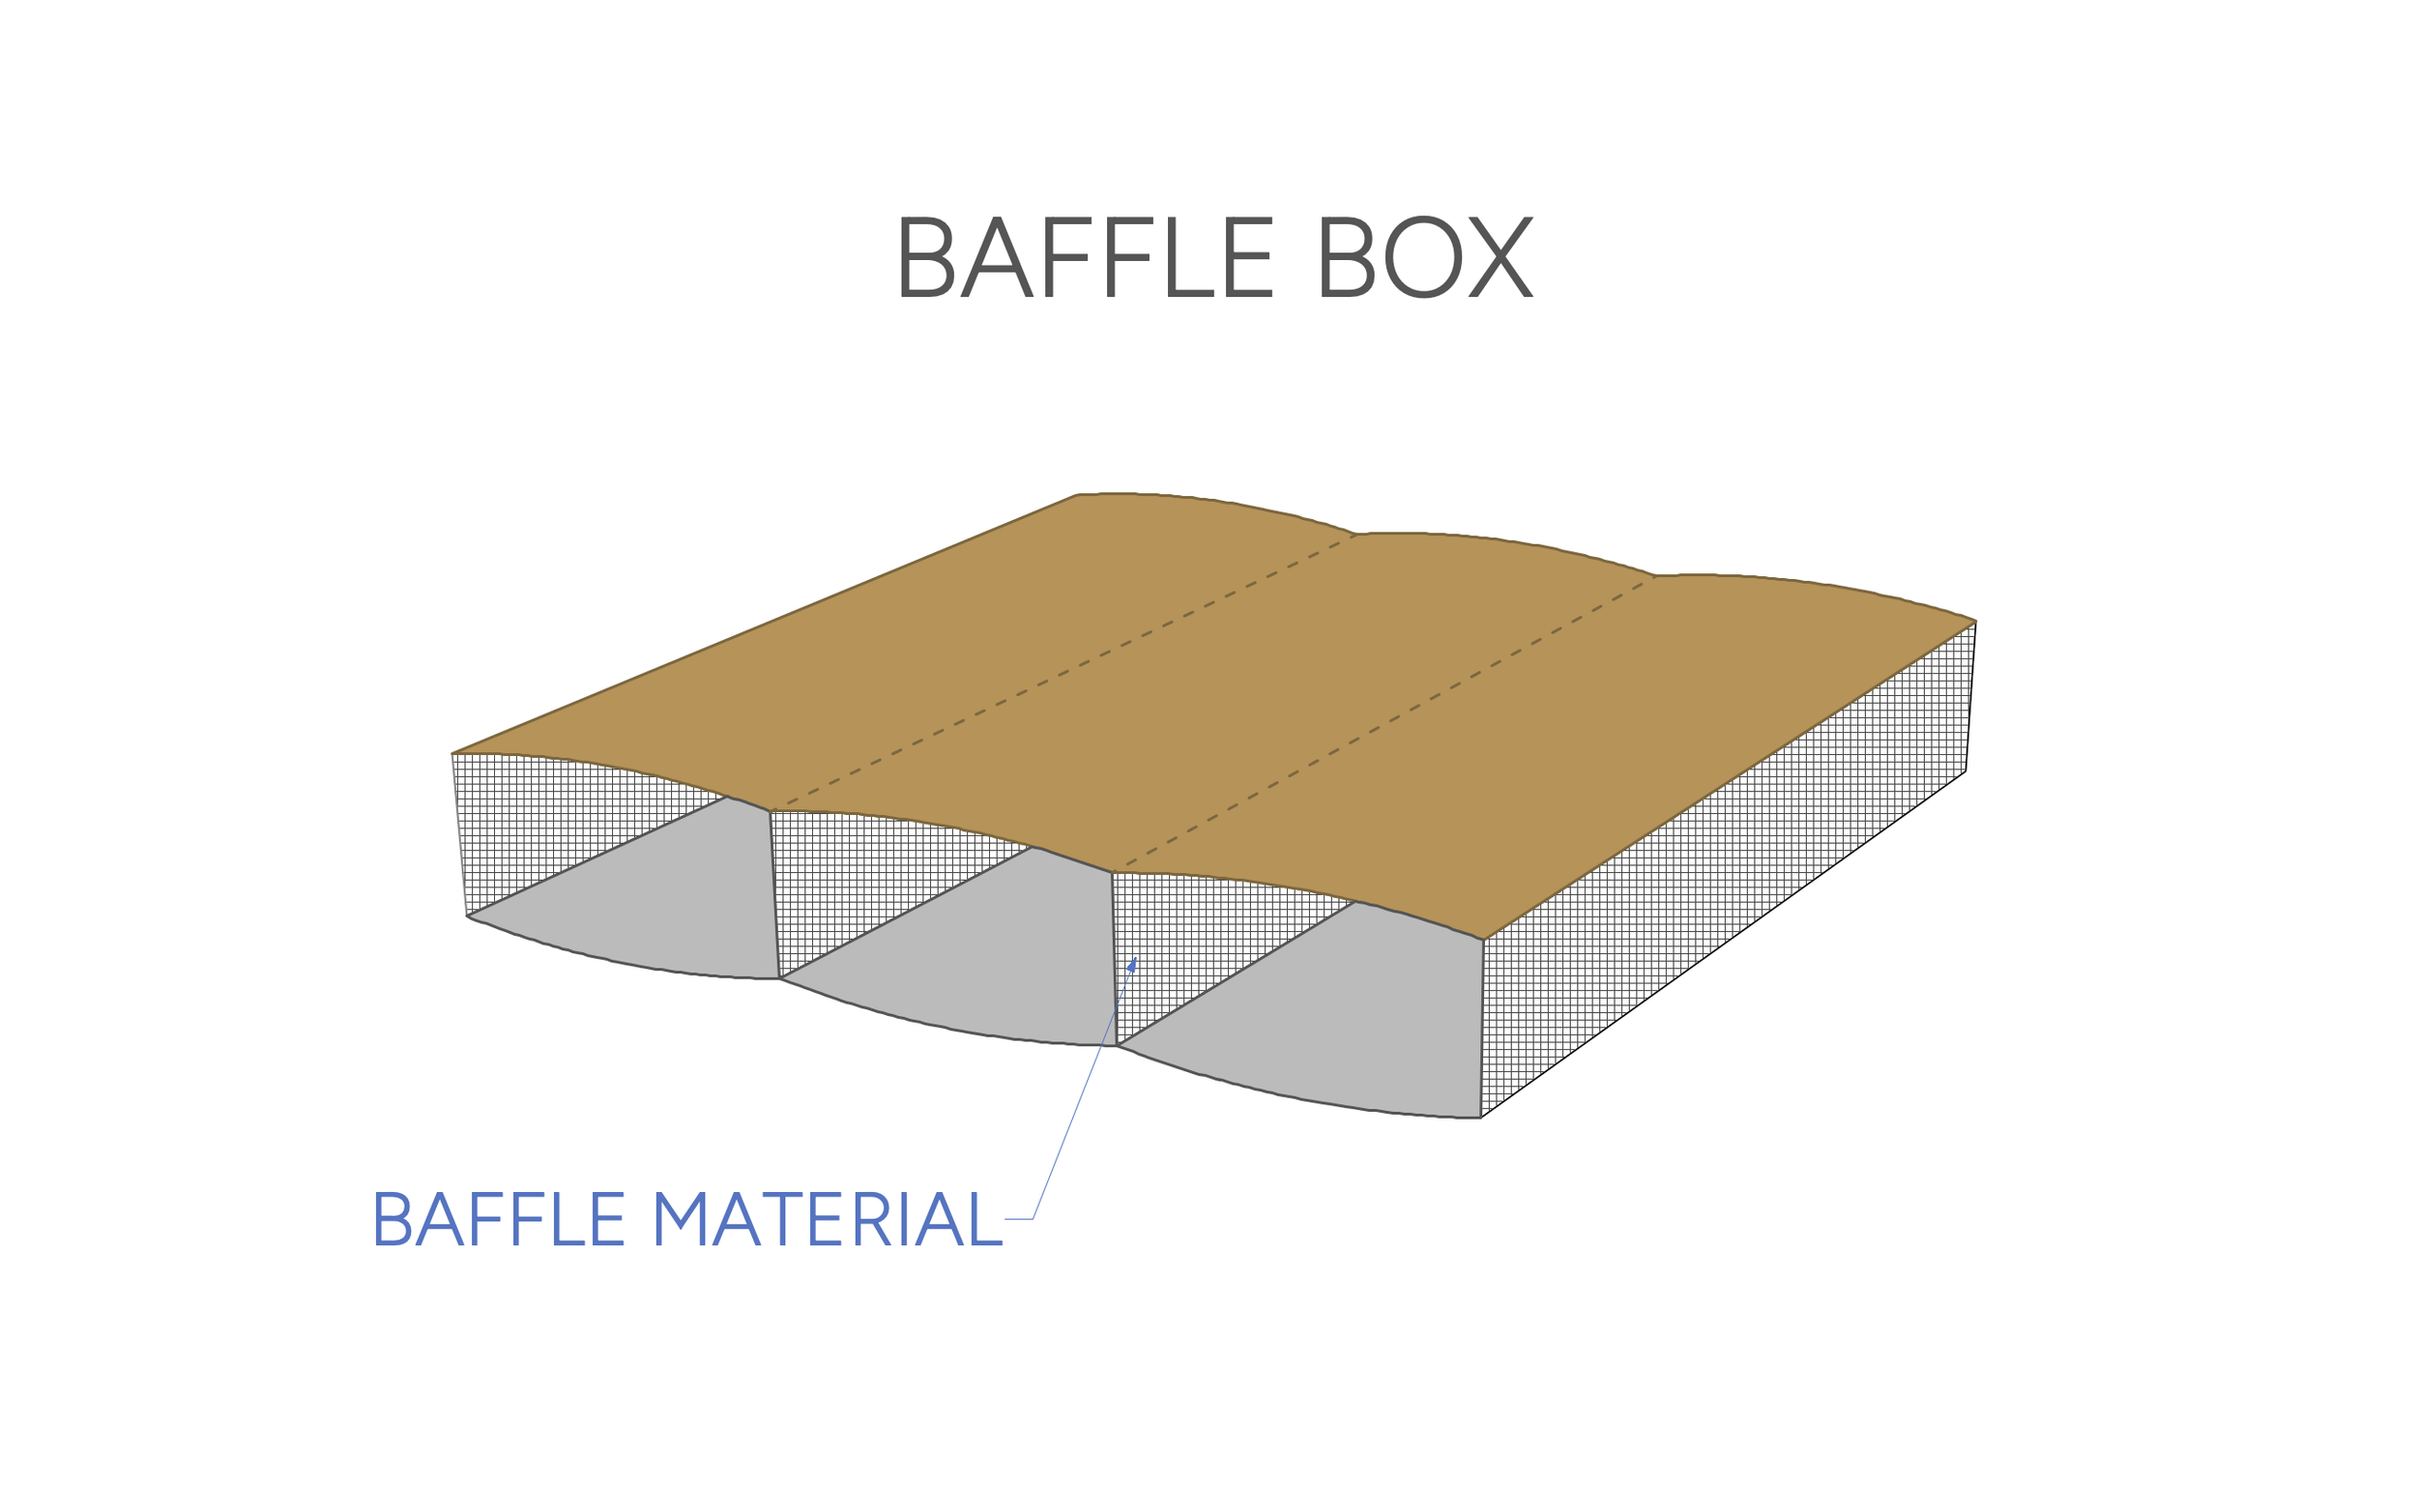
In “Baffle Box” construction a strip of fabric (usually no-seeum netting) is sewn to the inner and outer layers of the quilt forming a box shape. This eliminates the cold spots created with sewn through construction. It also allows the down to loft to its full potential. These baffles generally run across the quilt either horizontally or vertically, creating long channels that are individually filled with down. This type of construction does a good job at minimizing down movement, but filling the individual compartments can be tricky and time consuming.
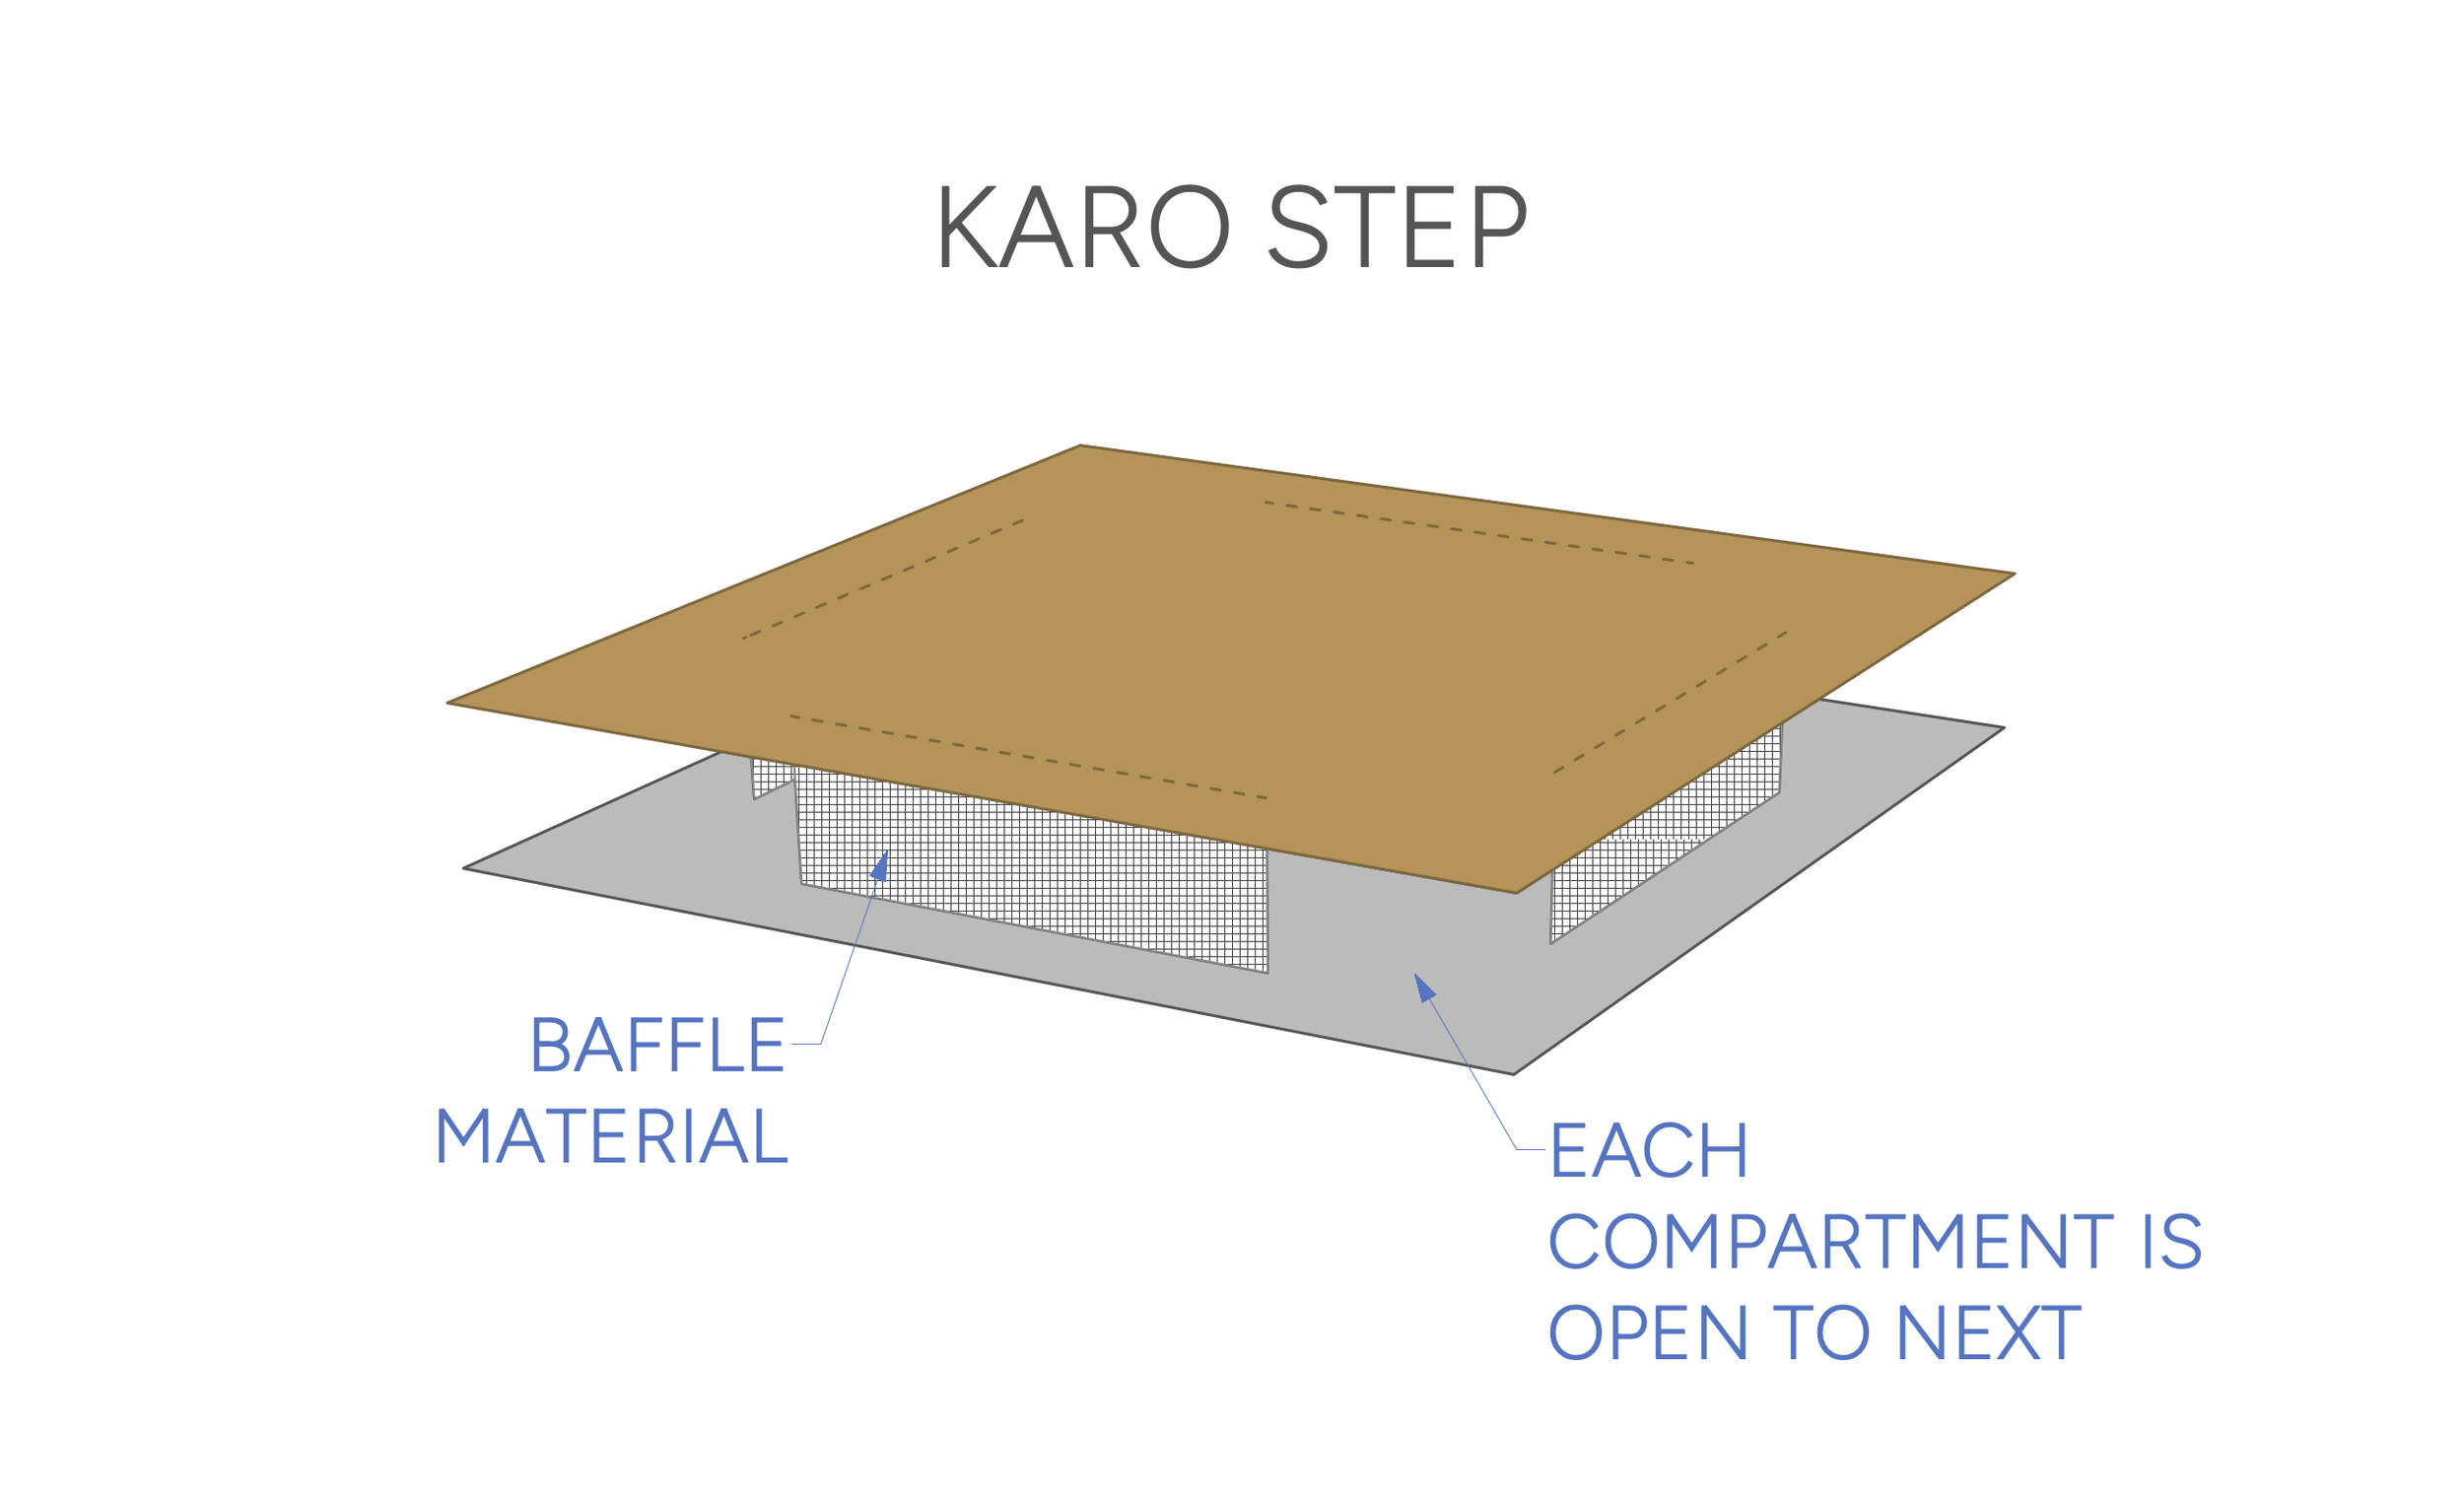
“Karo Step” construction is a type of baffle construction. It has the same advantage as baffle box construction in that the cold spots are eliminated. But, rather than use long strips of baffle material to form channels, short sections of baffle material are used to form smaller compartments as shown above. This can make for a lighter quilt because less baffle material is used. (Depending on the baffle layout.) In this method, each compartment is open to the compartment next to it. This makes filling the quilt with down much easier, as all of the down can be added at once and then distributed throughout the quilt. It can even be distributed so that there is more down in the compartments at the top of the quilt where it is needed more, and less along the edges where it’s not. But, this strength is also its weakness, because it means that the baffles do not completely control the down and it can migrate from compartment to compartment with use. How much the down moves depends on the size of the compartments and baffles, as well as how full of down the quilt is.
Baffle layout
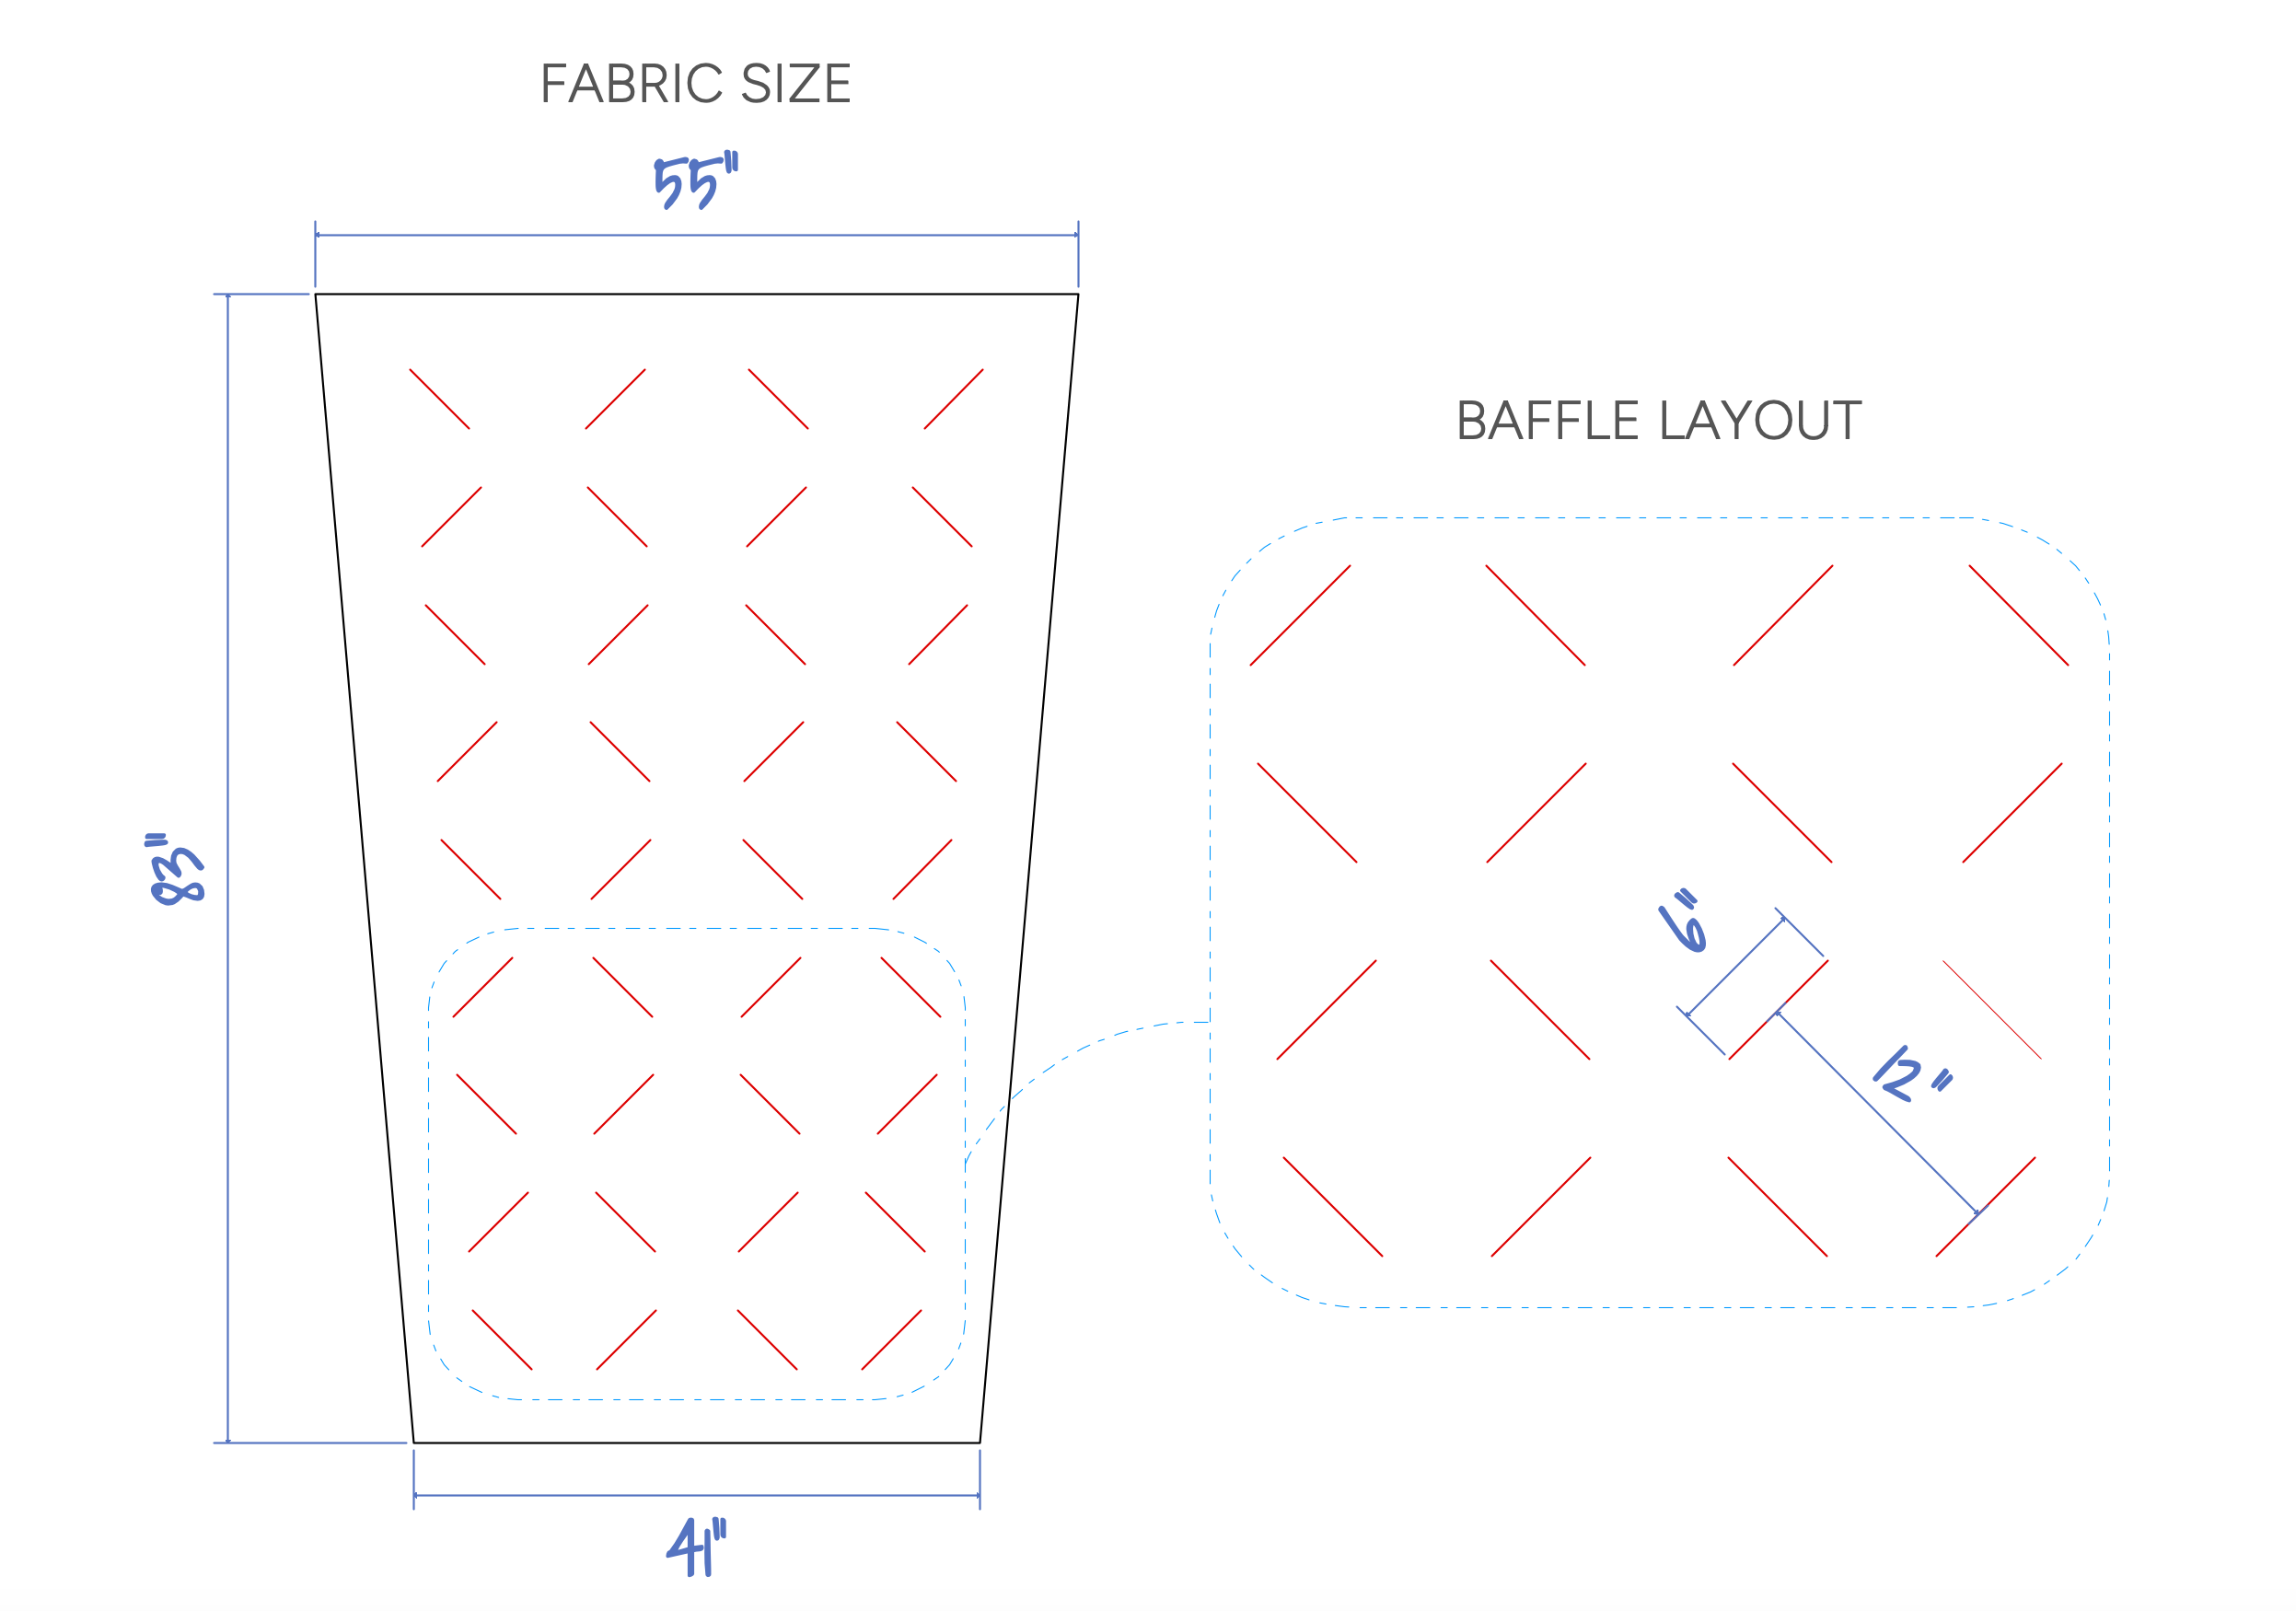
Because of this particular weakness, the layout of the baffles is important. You may see people refer to Karo Step baffles with a numerical designation such as 12:6. This refers to the size of the box and the length of the baffle. For example, a 12:6 layout indicates that the boxes formed by the baffles are 12"x 12" and the baffles used to create the box are 6" long. The baffle is placed centered on the edge of the box as shown below.

12:6 seems to be a commonly recommended layout, but other layouts can be used as well. (For more information on potential baffle layouts see this thread from Backpacking Light.)
One of the things I think is interesting about Karo step baffles is that they don’t necessarily have to be laid out in squares. I have seen examples of triangles, hexagons, and staggered arrangements. This allows for some creativity in making a unique looking quilt. Of course the trick is finding the right spacing so that there are enough baffles to contain the down, and minimize it from shifting around.
For my quilt I decided to use square compartments but orient them at a 45 degree angle to the grain of the fabric. I thought that stitching the baffles along the bias of the fabric, might allow the baffles to stretch, and result in a quilt with better draping qualities. (In the end I'm not sure that it really made a difference, but I do like the way it looks.)
I also wanted the baffles to match the taper of the quilt. This way there would be a consistent distance from baffles to the edge of the quilt. (This is important for the way I decided to stitch up the sides of the quilt as you will see later on.) As a result, the layout I used has boxes that are approximately 12” x 12” at the bottom of the quilt, but they gradually increase to roughly 14” x 14” at the top of the quilt as you can see below.
Note: See my final thoughts on this layout at the end of the article.
The height of the baffle will determine how thick the quilt is. This in turn, is related to how warm the quilt will be and how much down will be needed to fill it. The thicker the quilt the warmer it is. (See this article from Enlightened Equipment for more info on this topic.)
I wanted a 30 degree rating for my quilt so I decided to use a 2” tall finished baffle height. Allowing for a 1/4” seam allowance on the top and bottom, I cut the baffles at 2-1/2” tall.
Materials:
A calendered fabric should be used for down quilts. Calendered fabrics have been run through heated rollers which seal the weave of the fabric making them down proof. I used Argon 90 for both the inner and outer layer of the quilt. I also used 12oz of 850 hyperdry goose down. I ordered both from Dutchware Gear, and I’m happy with how they worked out.
I also used some no-seeum netting for the baffles and some 3/4” grosgrain, as well as some drawcord and a cord lock.
Creating a pattern
Although you could measure and mark the baffle locations directly onto the fabric, I figured it would be faster and more accurate to create a full scale pattern that could be used to both cut out the shape of the fabric, and mark the baffle locations. I made this pattern from butcher paper. The pattern was made for only one half of the quilt using the straight edge of the butcher paper as the centerline of the quilt. After cutting the butcher paper to size, I measured and marked out the baffle locations based off of the layout I had done on the computer.
Cutting out the fabric
Fold the fabric in half lengthwise wrong sides together. Pin the pattern to the fabric so that the straight edge of the pattern is aligned with the folded edge of the fabric. Cut the fabric using the pattern as a guide.
Marking the fabric
Use marking paper and a tracing wheel to transfer the baffle marks from the pattern onto the fabric. (Marks should be transferred to the wrong side of the fabric.) Both halves of the part can be marked at the same time by folding a piece of marking paper so that the chalky sides face out, and inserting it between the layers of fabric.
Hemming the top edge
Fold a half inch single fold hem along the top edge of the quilt. Fold wrong sides together. Stitch the hem in place as shown below. Repeat all of the previous steps with the second piece of fabric.
Cut baffles
Cut the baffles to size. In my case I needed 36 baffles, each 2-1/2" x 6". A rotary cutter and cutting mat with dimension markings is helpful for this step.
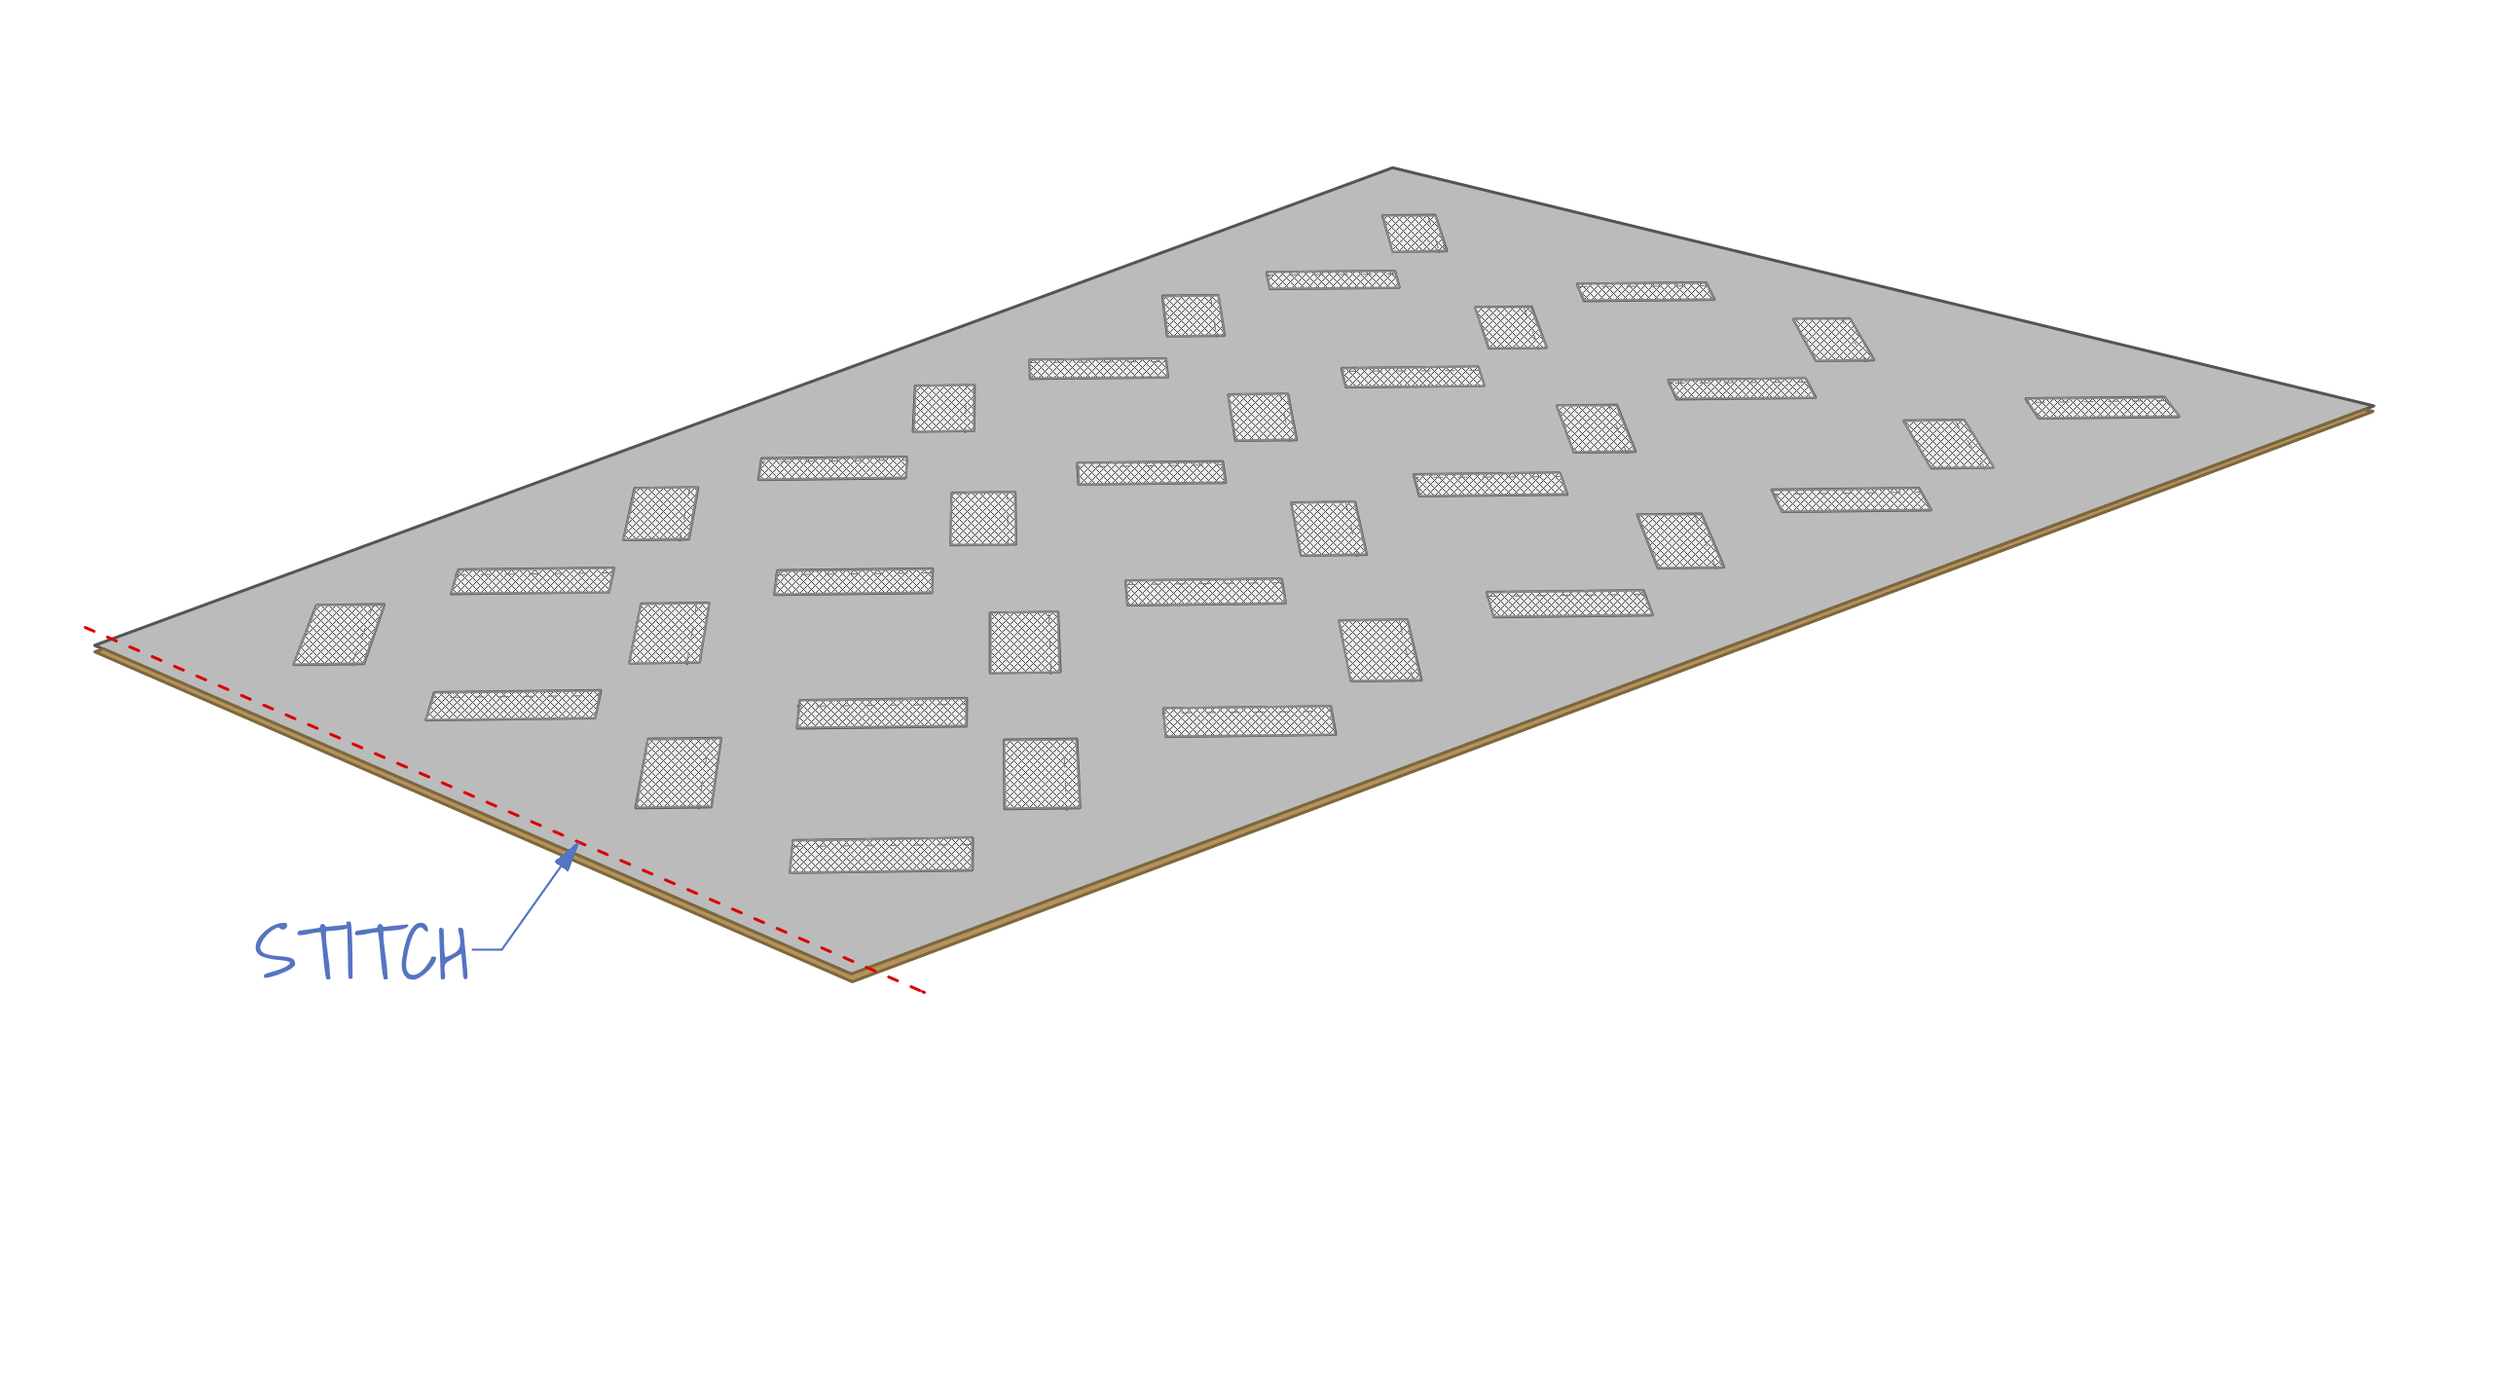
Stitch baffles to outer layer
The next step is to stitch the baffles to the inner quilt fabric layer. I found that blue masking tape worked well to hold the baffle in place while stitching. Align the baffle with the mark on the fabric. The baffle should overlap the line by whatever seam allowance you have decided to use (in my case 1/4"). Then tape the baffle in place. Stitch the baffle in place stitching along the marked line.
Repeat this process until all baffles are in place. I found that it was easiest to tape two baffles in place and then stitch them before moving on to the next two. (I was able to reuse the same tape pieces several times before new tape was needed.)
Drawstring tube
Cut a piece of fabric that is 40” x 3-1/4”.
Sew 1/2" single fold hem on the short ends of the piece as shown below. (Fold right sides together.) Pin a 3-1/4” long piece of 3/4" grosgrain to the right side of the fabric, flush with the end of the piece as shown below. The grosgrain will cover the edge of the folded fabric. Stitch the grosgrain in place along both edges as shown below. Repeat on the other end of the part.
Fold the drawstring tube in half lengthwise so that wrong sides are together. Stitch with a 1/4" seam allowance as shown.
Assembling bottom edge of quilt
Pin the drawstring tube to the right side of the outer quilt fabric as shown below. The tube should align with the bottom edge of the fabric and be centered left to right as shown.
Pin the inner quilt fabric to the outer quilt fabric, right sides together, with the edges aligned. (The drawstring tube will be in between the two parts.)
Stitch the bottom edge with a 1/2" seam allowance as shown.
Stitch baffles to inner layer
Fold the parts so that the inner and outer layers are wrong side together. Starting at the bottom of the quilt, align the baffles from the inner part with the corresponding marks on the outer part. Use tape to hold the baffle in place and stitch along the line following the same procedure used previously.
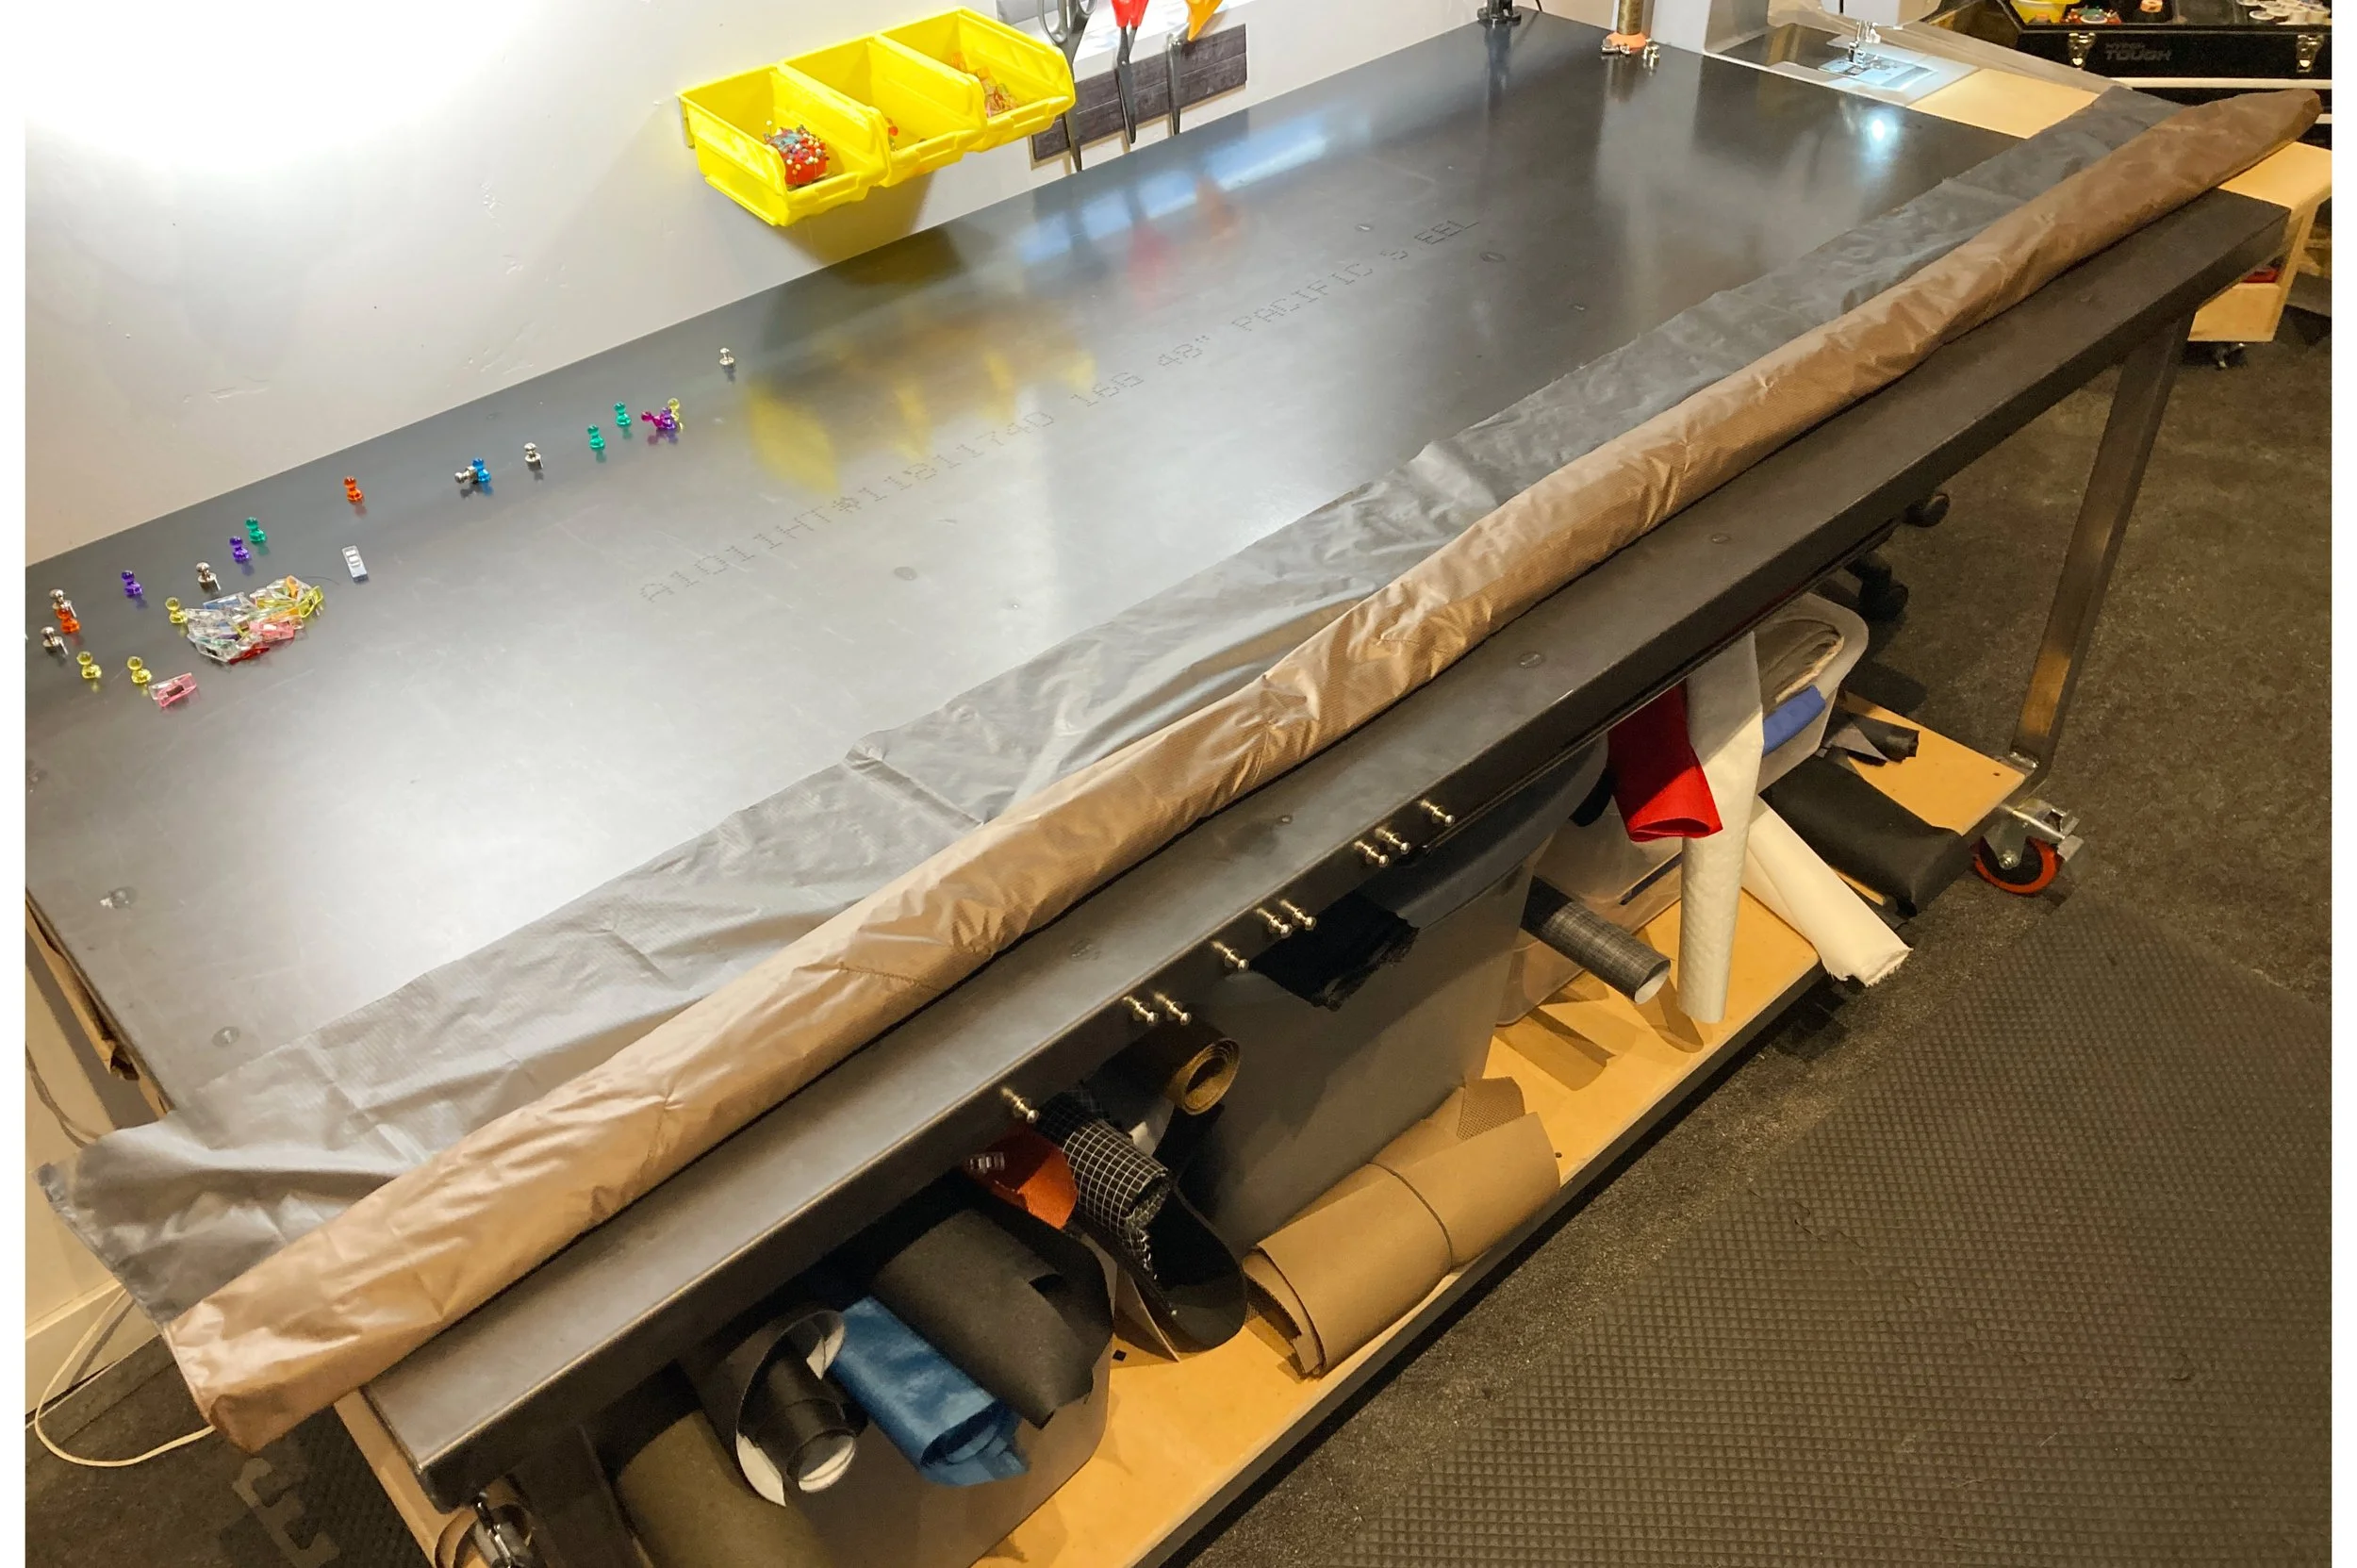
Sewing the baffles to the outer layer is a fair bit trickier than sewing them to the inner layer. I found it worked best to go one row at a time and keep the rest of the fabric rolled up and held out of the way with clips as shown in the photos below. (This step is by far the most time consuming part of the project.)
Assembling the sides of the quilt
Once all of the baffles are stitched to both the inner and outer layers of the fabric, it’s time to stitch up the sides. Roll the quilt up along its length as shown below.
Once the quilt is rolled up to the last baffles, turn the remaining section of quilt so that right sides are together. (The rolled up quilt will be in between the layers of fabric.) Pin the sides of the quilt right sides together so that the edges are aligned.

Foot box closure
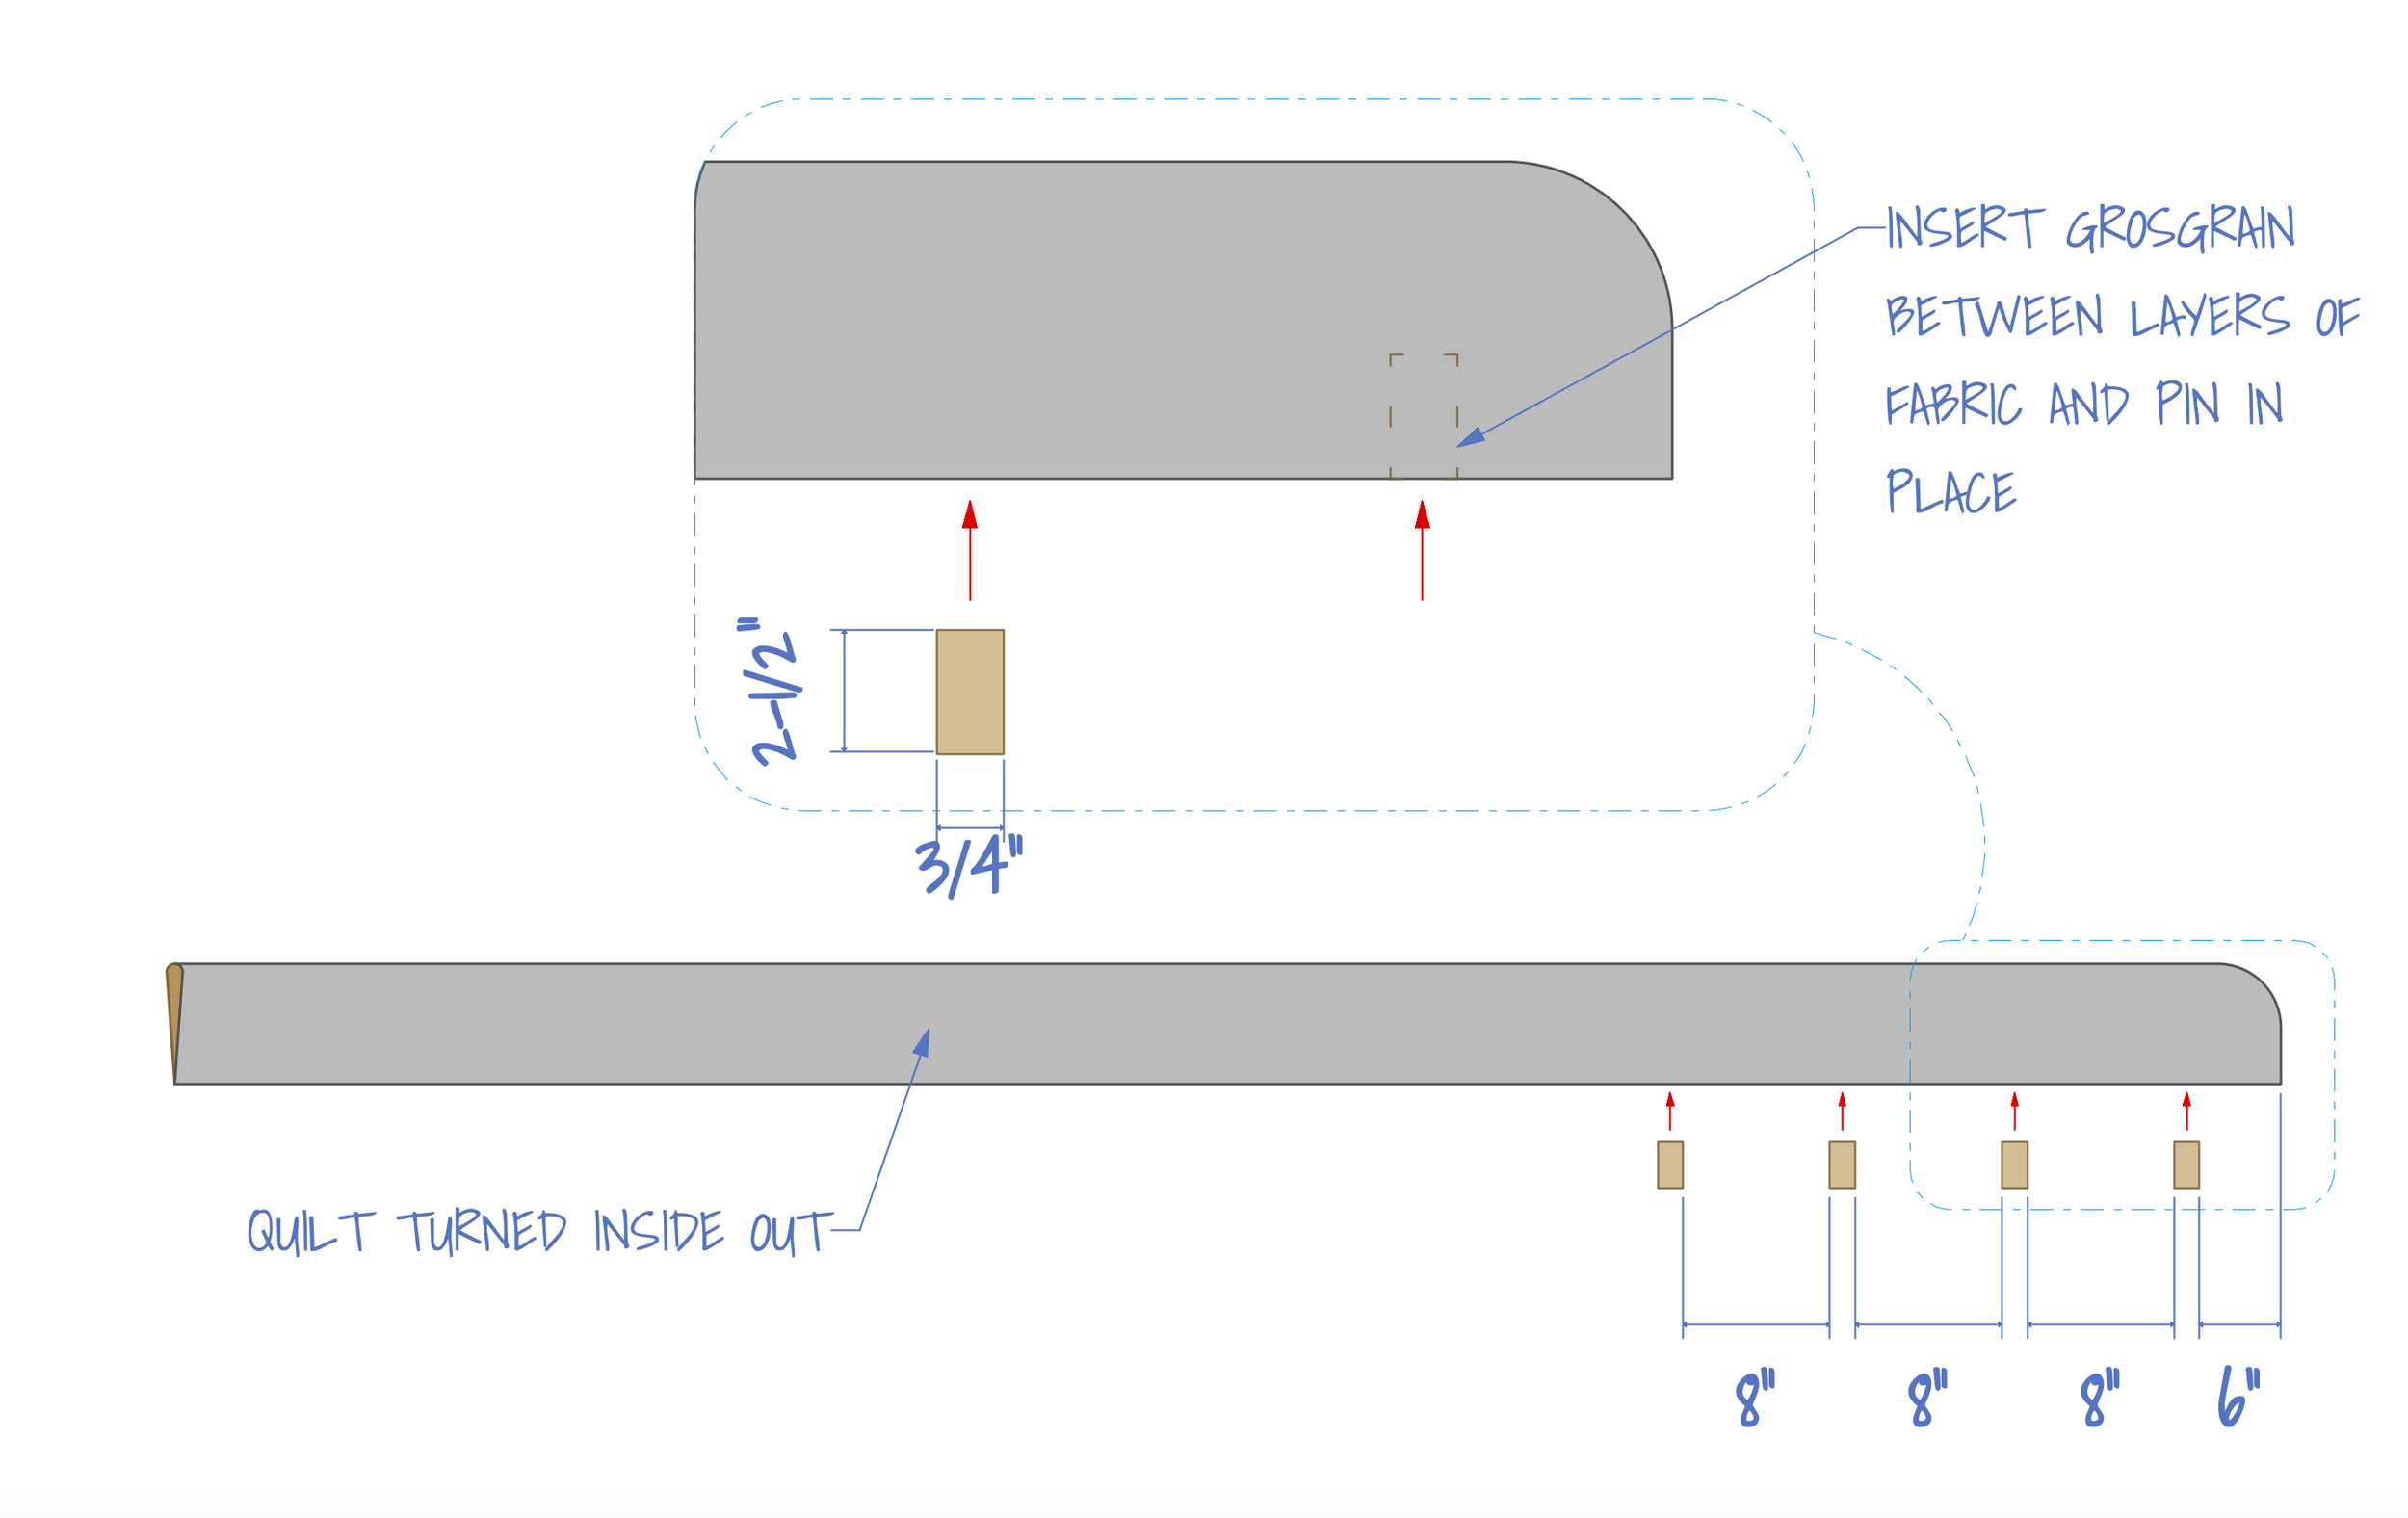
I decided to use grosgrain tabs with snaps on them to form the foot box. To do this I took 1-1/4” long pieces of 3/4” grosgrain and pinned them between the layers of the quilt. I wanted a tall foot box so I used 4 pieces of grosgrain spaced out at the dimensions shown below. (If a zipper is preferred over snaps, it could easily take the place of the grosgrain.)
Pad attachement straps
The next step is to pin whatever loops or buckles you plan to use for pad attachment between the layers of the quilt. I added loops of grosgrain that can be used for attaching cord if desired. I pinned one at the top of the quilt and the other about halfway between that and the first snap.
Stitch the sides together with a 1/2" seam allowance.
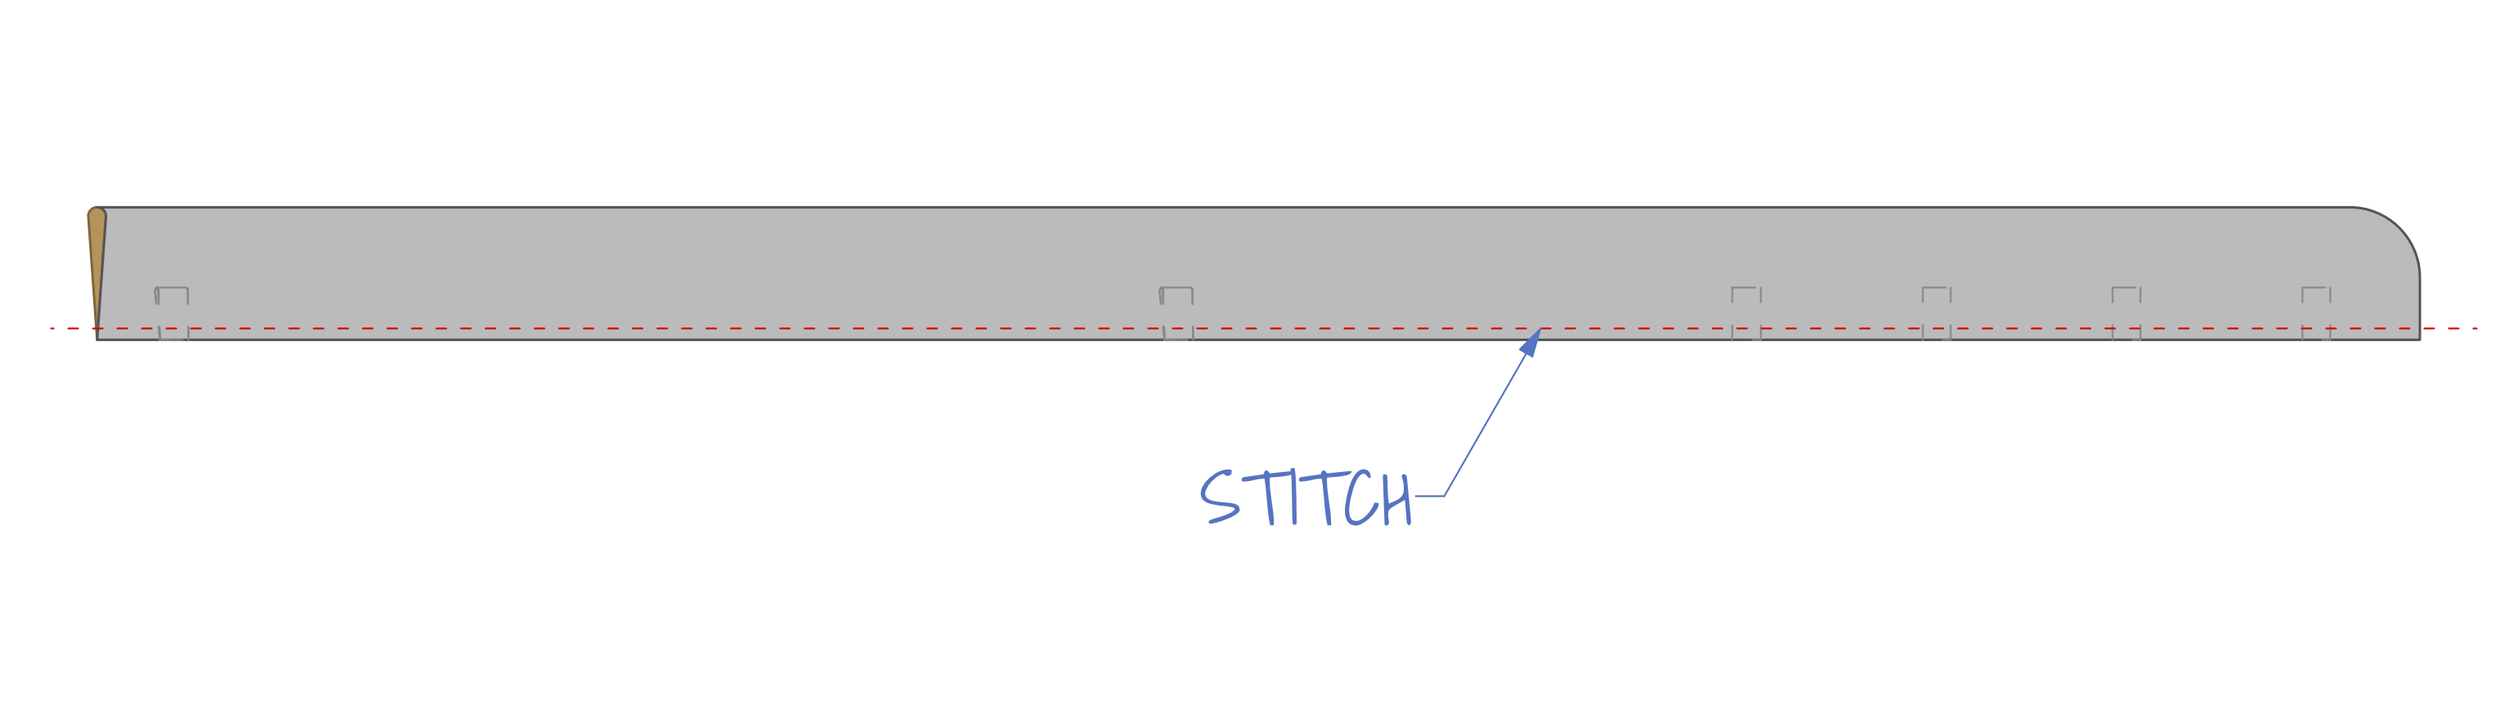
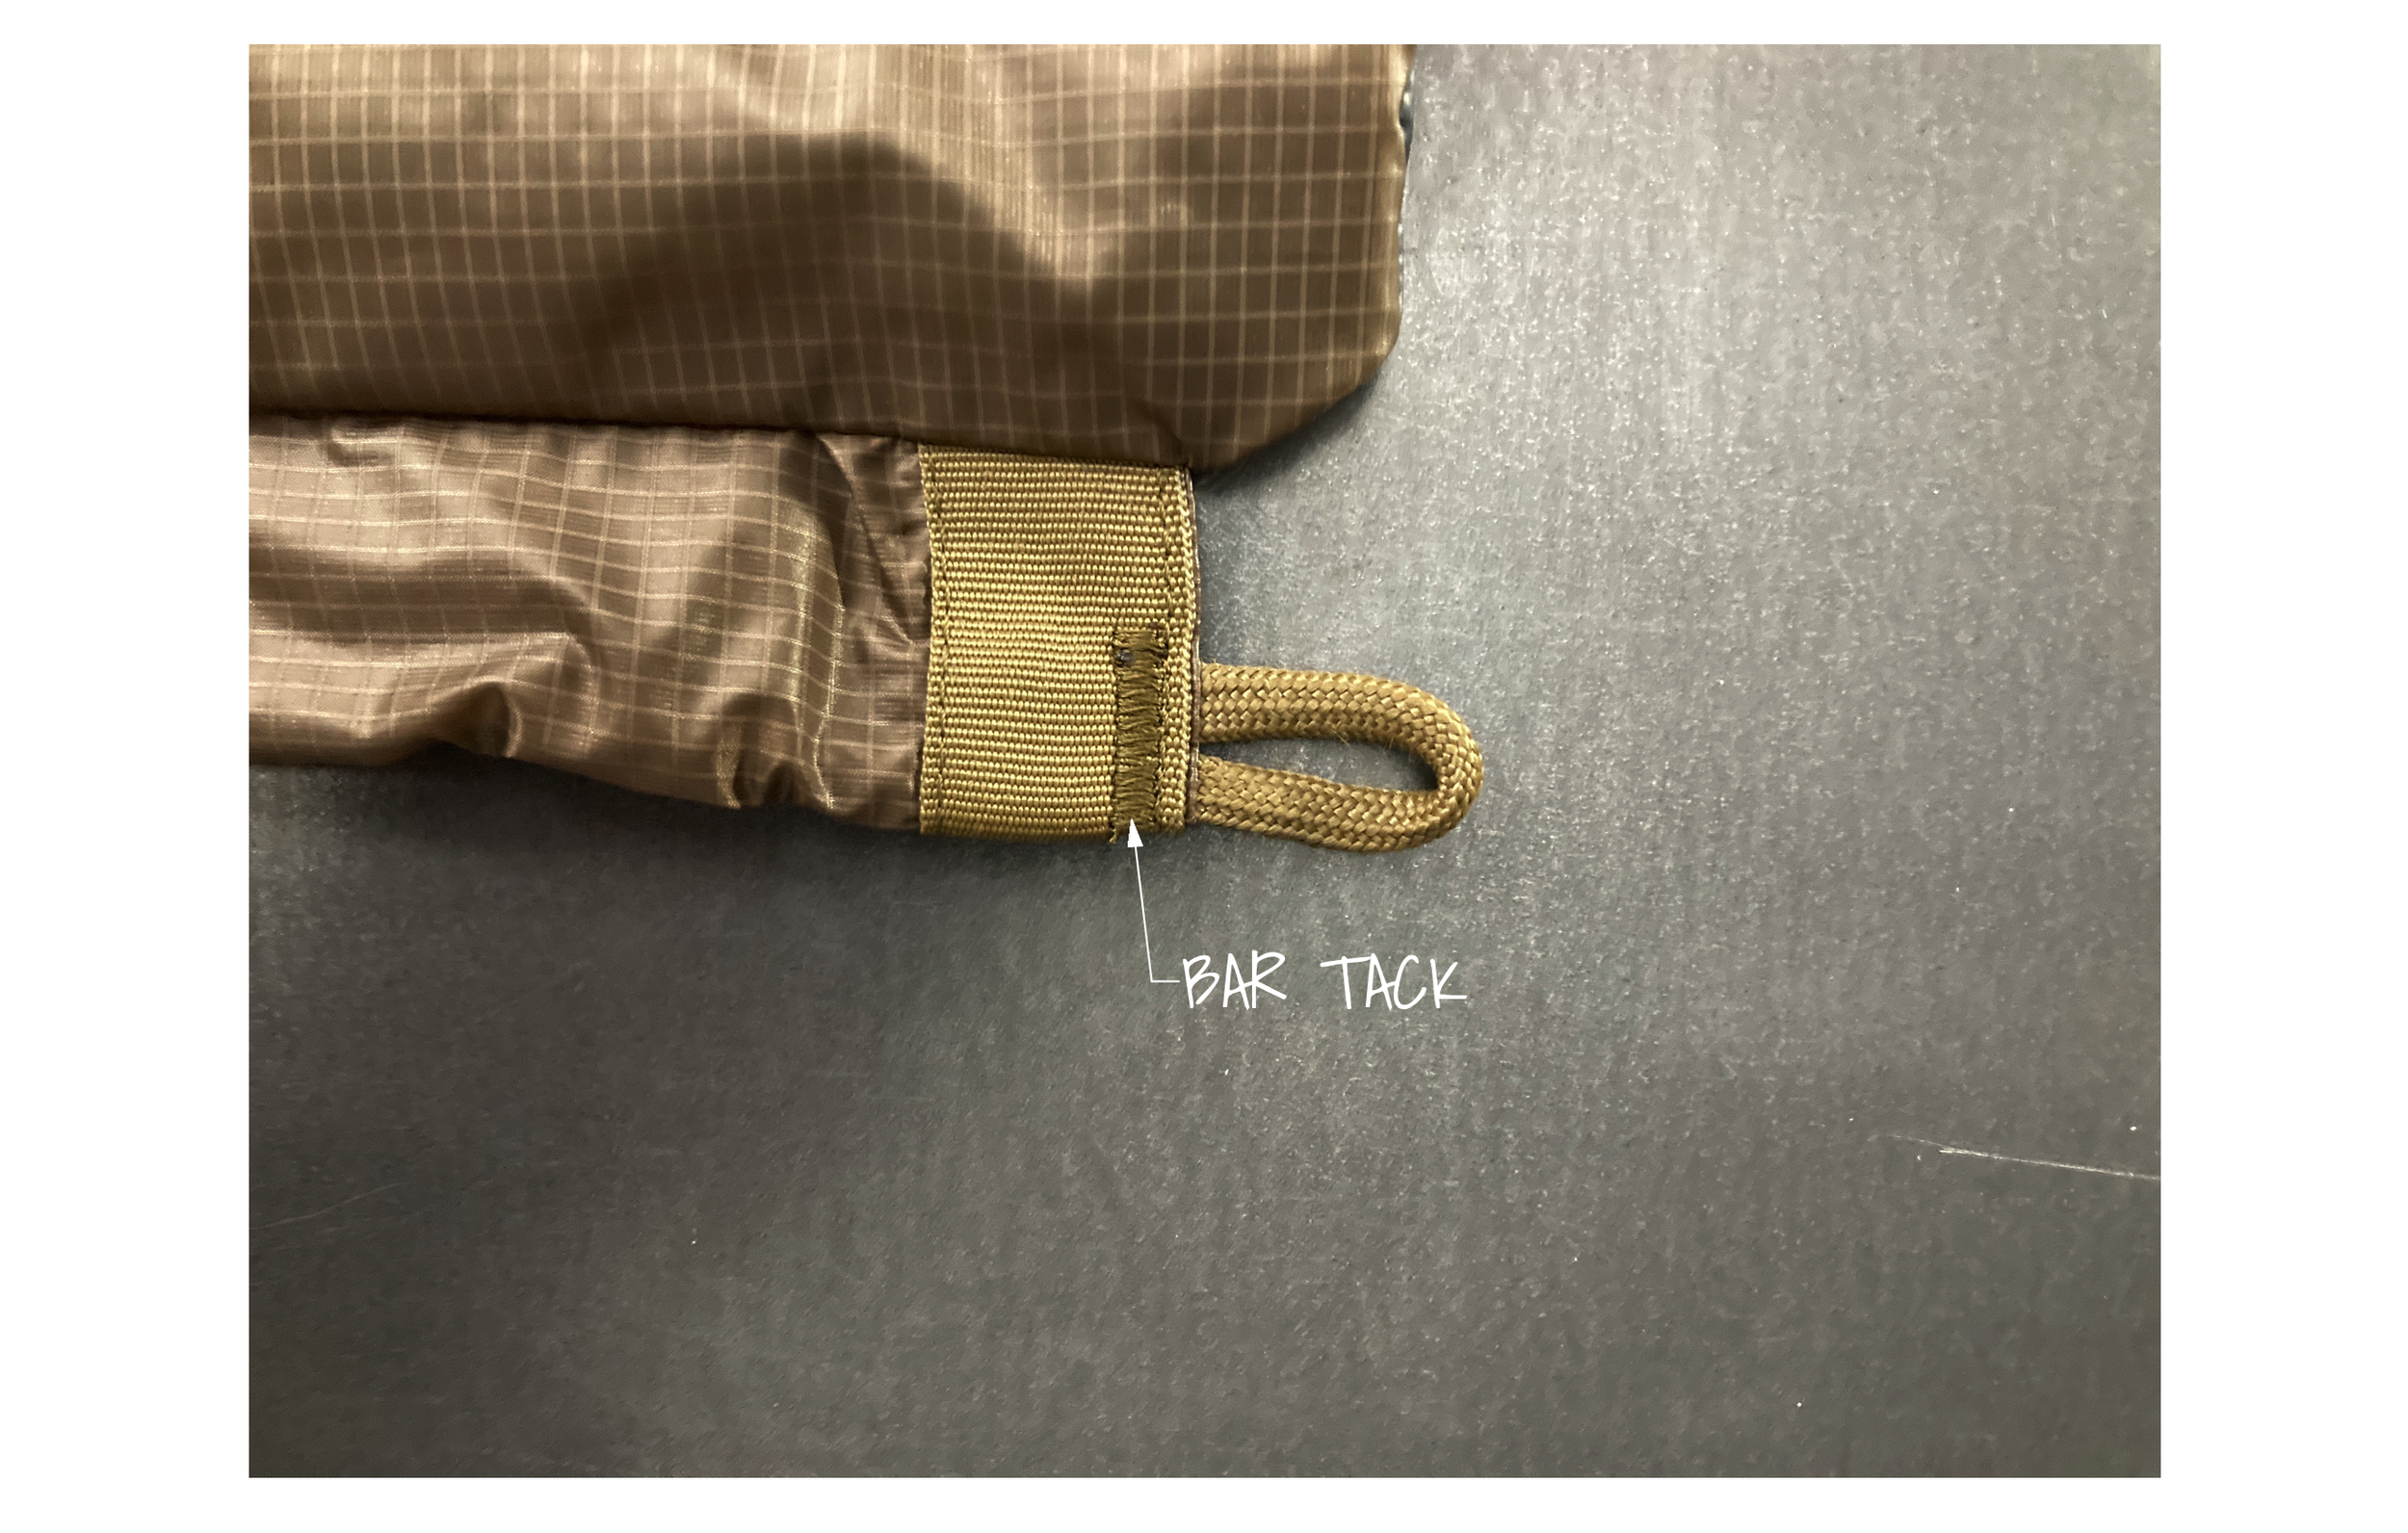
Stitch a bar tack at all of the locations where grosgrain attaches as shown below.
Turn the quilt right side out by pulling the rolled up quilt through the opening at the top of the quilt. Roll the quilt in the other direction and repeat the steps for assembling the second side of the quilt.
Finishing the foot box
Install the snaps on the grossgrain tabs as shown below. Be sure to install the snaps so that male and female sides mate up correctly.

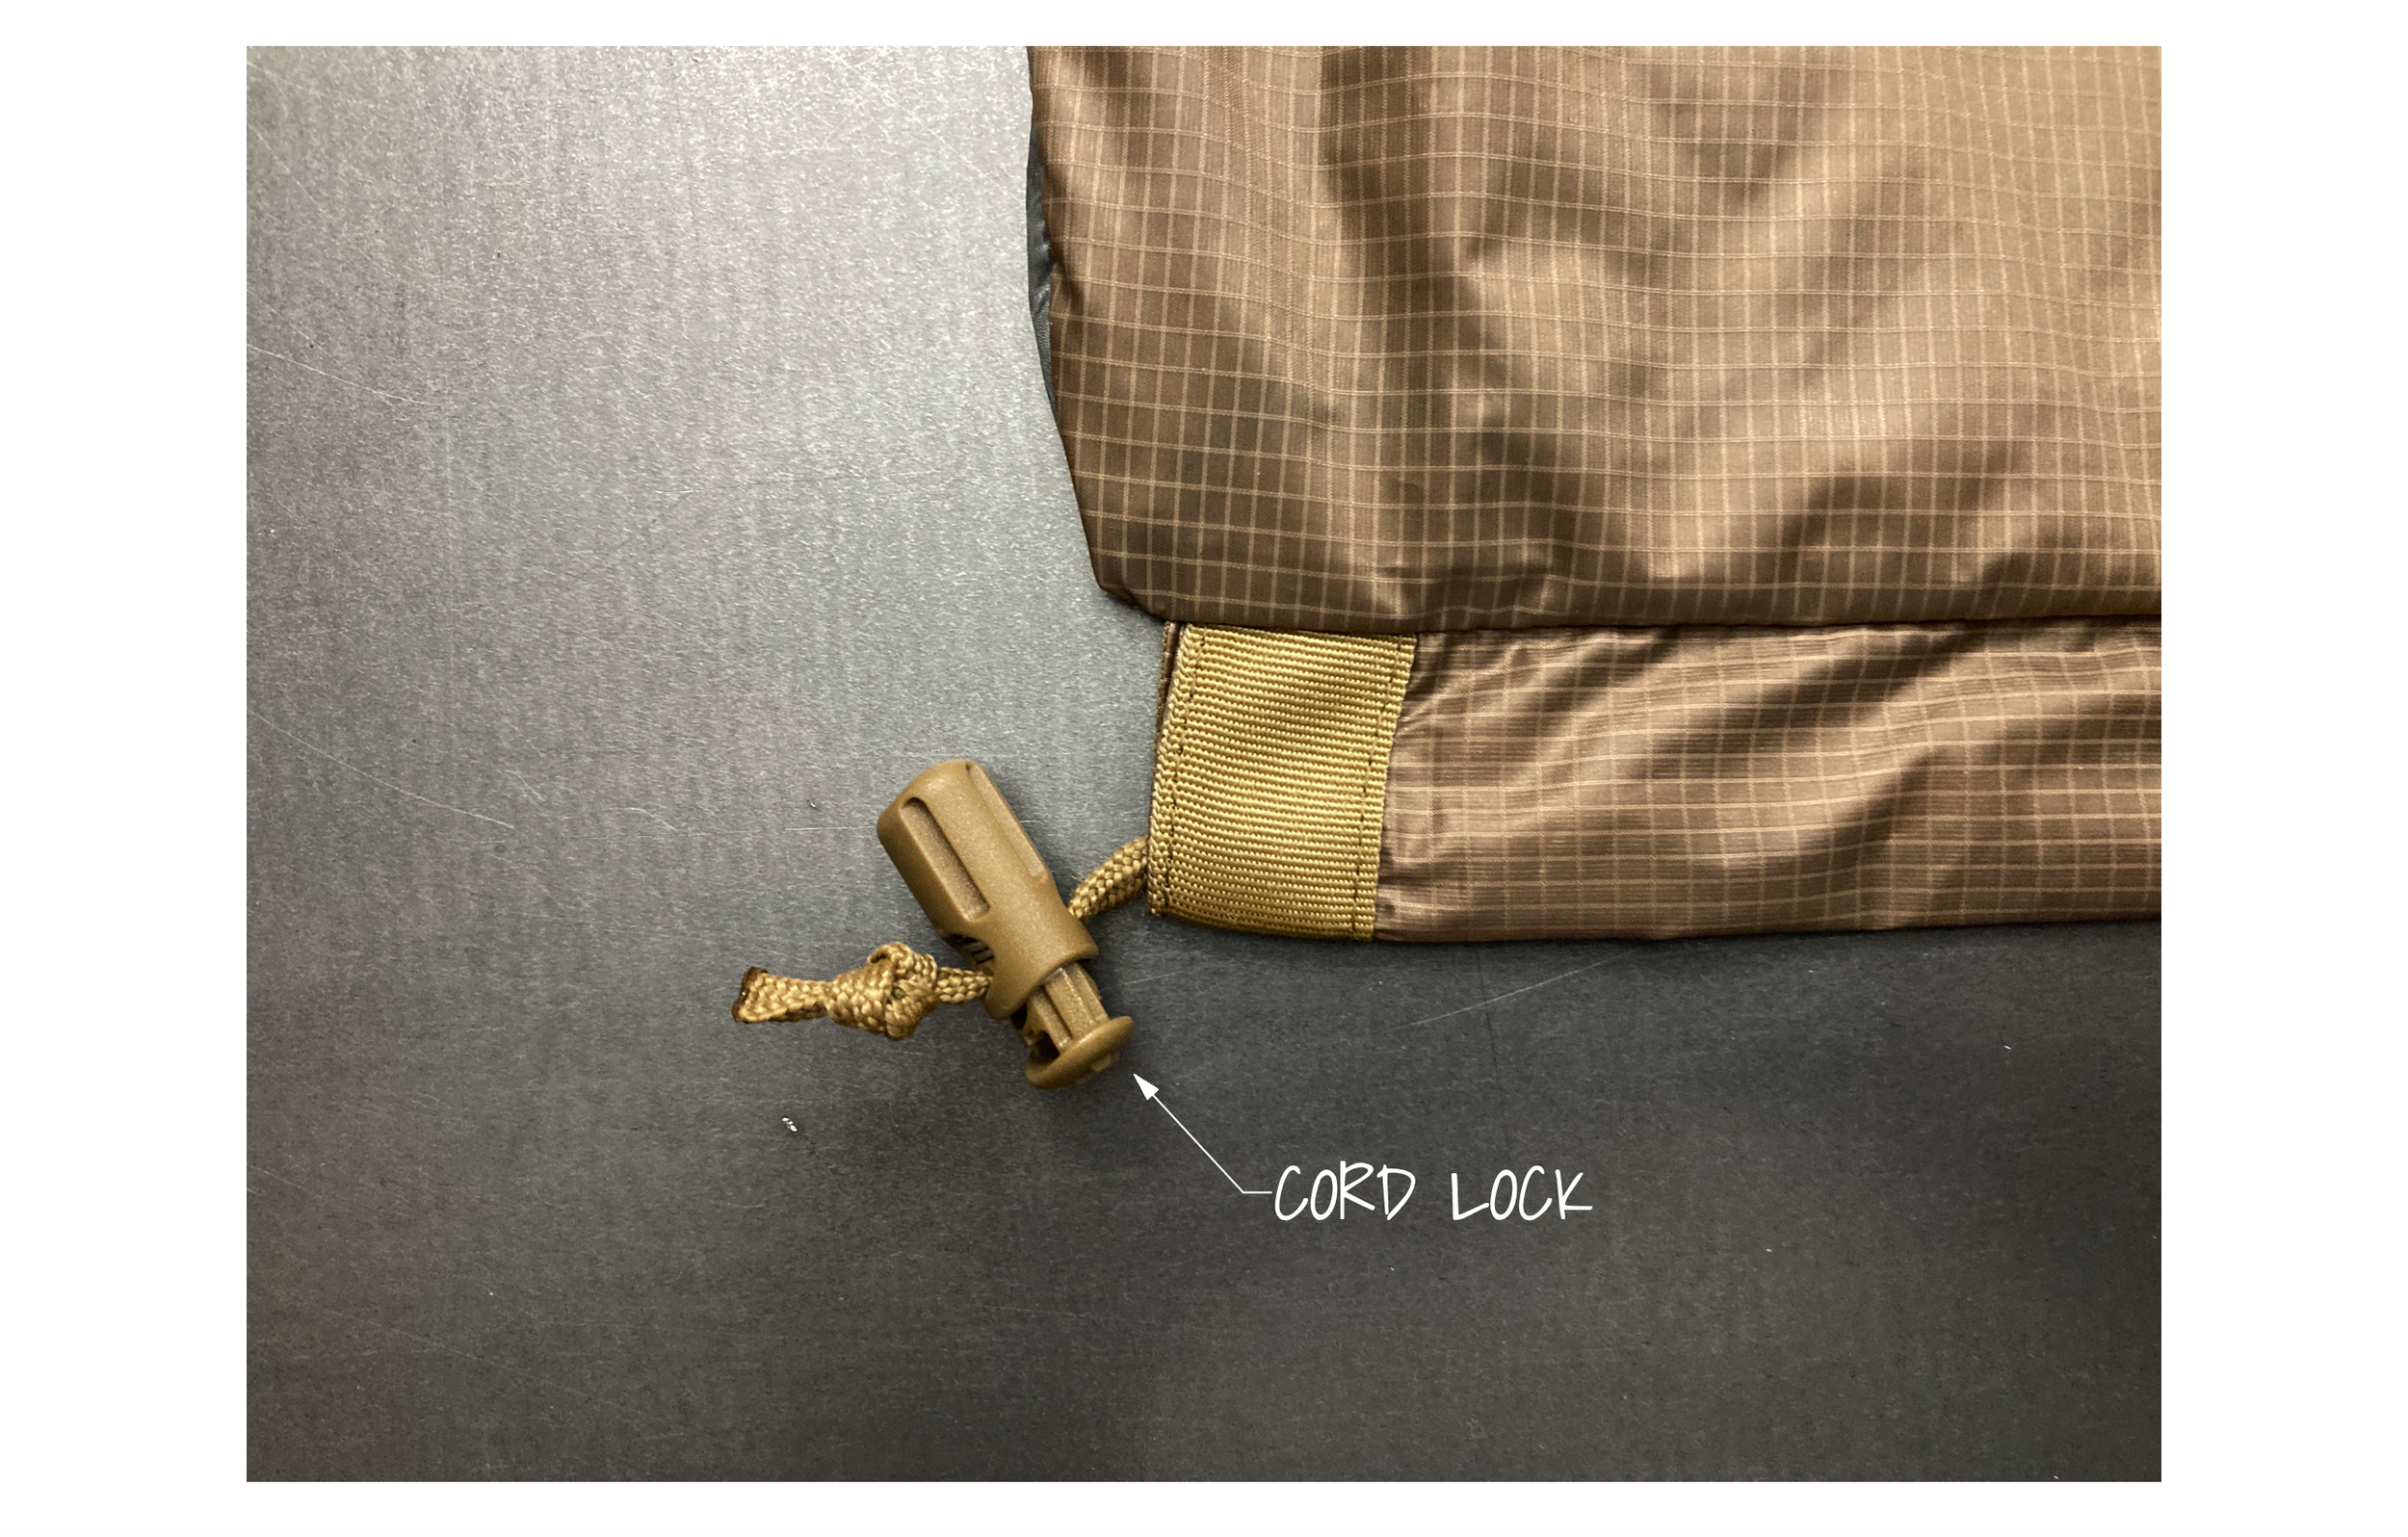
Take a 45” long piece of drawcord and run it through the drawstring tube. Form a loop on one end of the tube as shown below. The loop should be big enough for a cord lock to just pass through, but not much bigger. Stitch the loop in place with a bar tack as shown below.
Install a cord lock on the other end of the cord and tie a knot so the cord lock can't fall off. The bottom of the foot box is formed by passing the cord lock through the loop and tightening.
Filling the bag
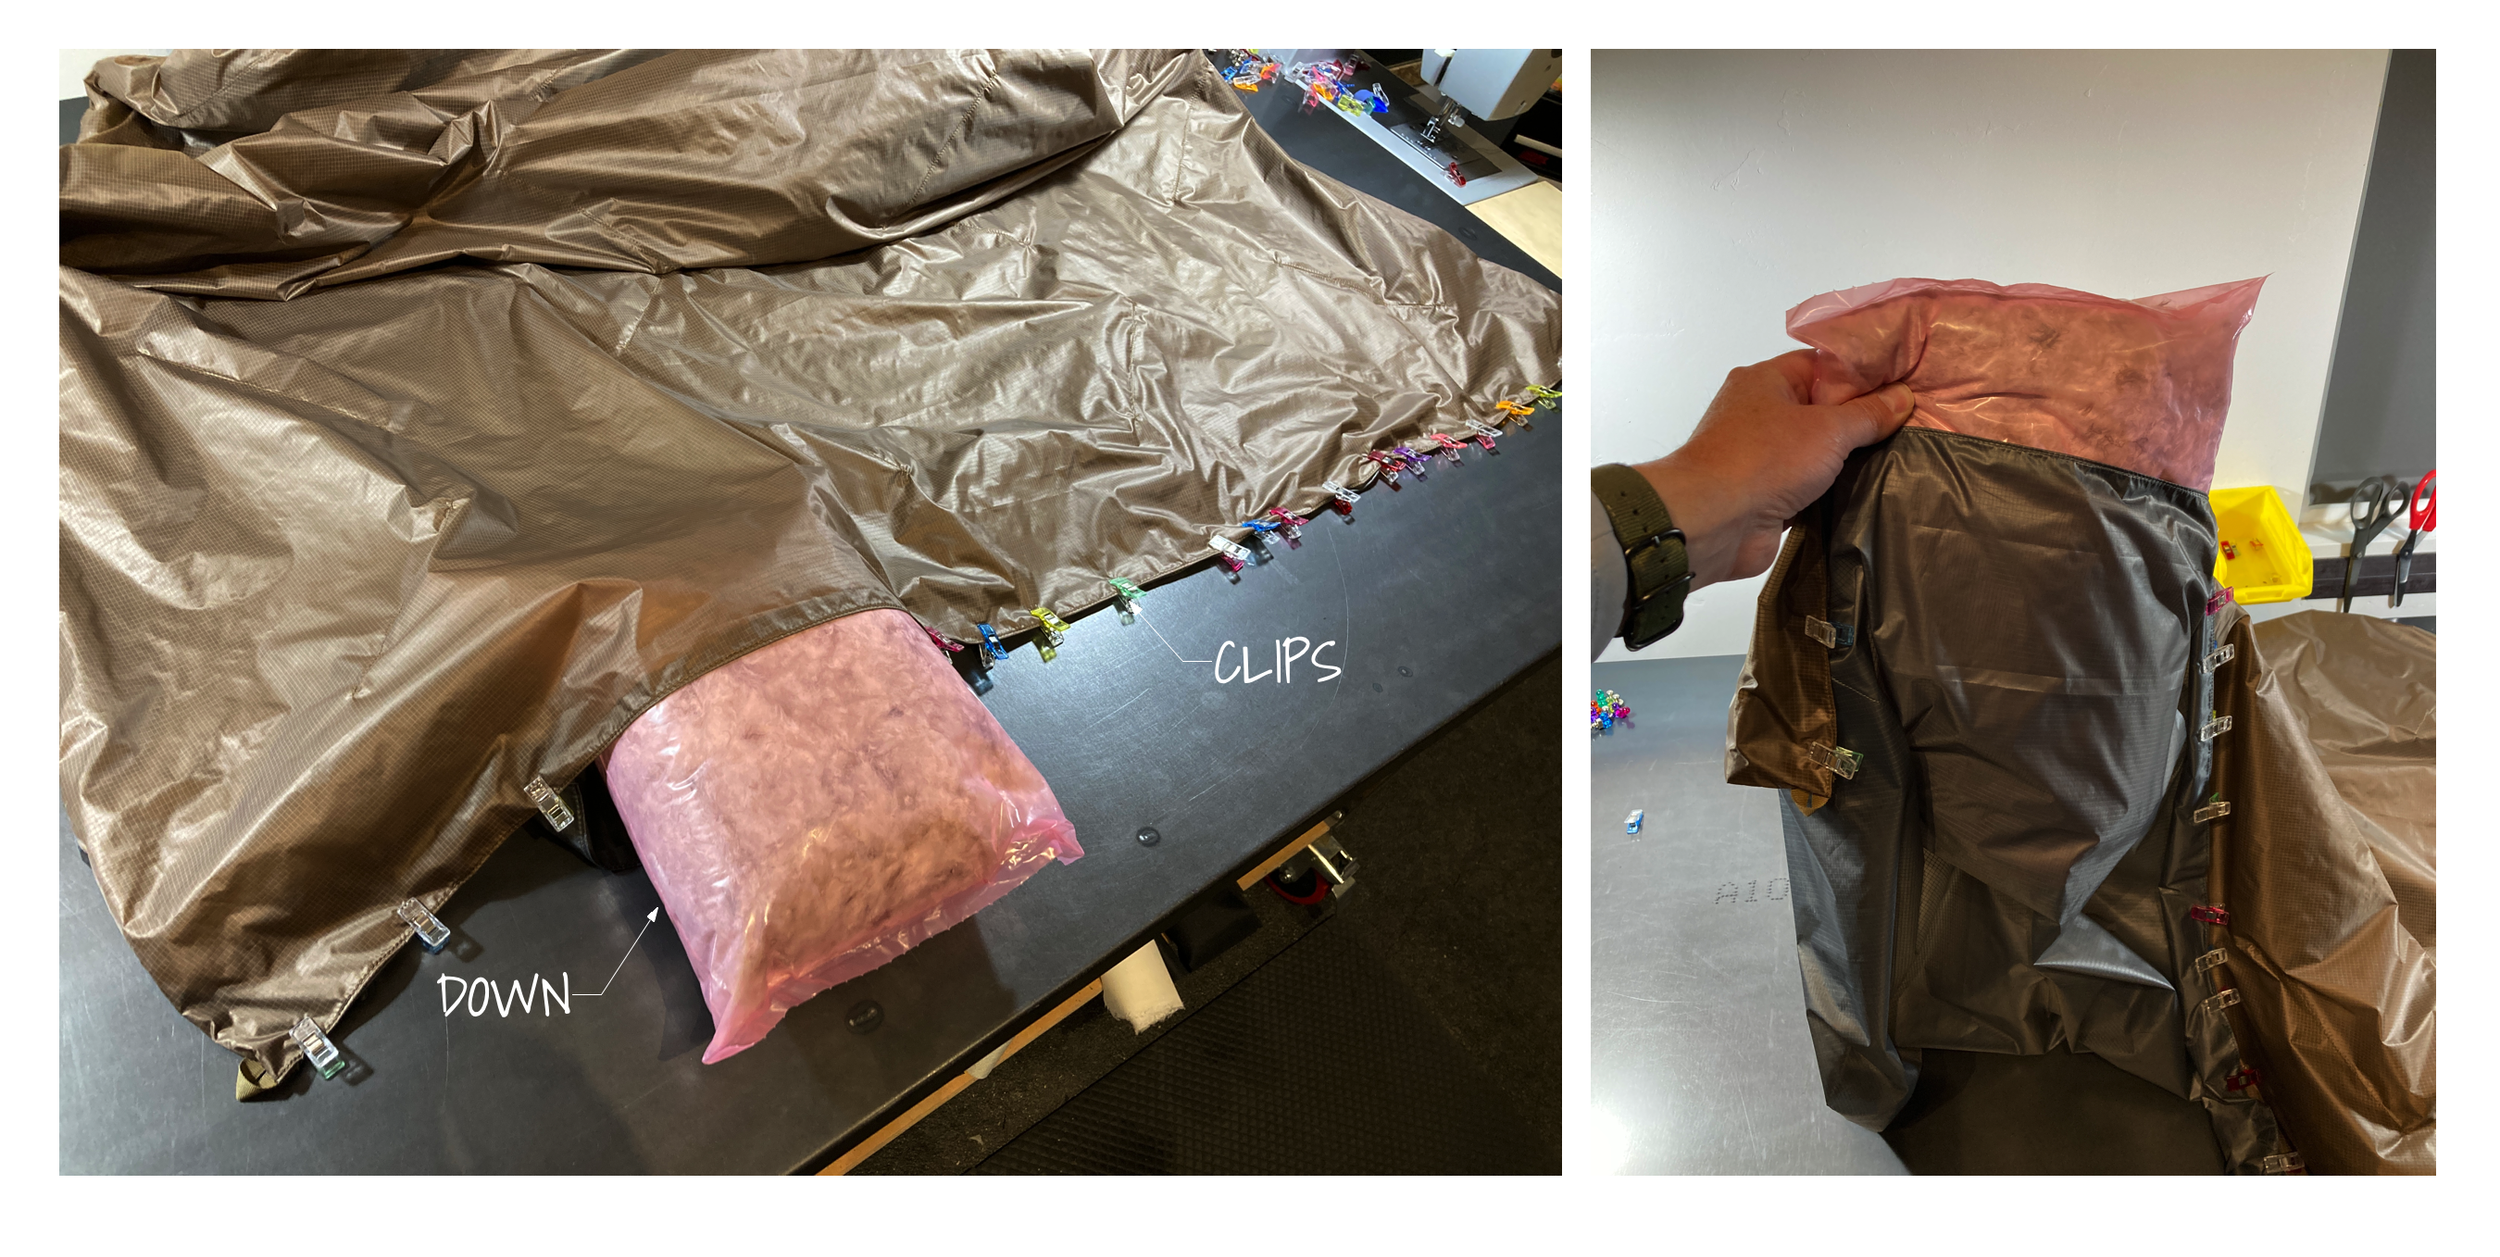
Fill the bag with the down. This is where one of the biggest advantages of the Karo Step baffle method comes into play. Instead of filling each compartment individually as you would with box baffles, here all the down can be filled through the top and then distributed to the different compartments. This makes filling the quilt much easier. The down I used came in 3 oz bags. I used clips to seal the top edge of the quilt leaving an opening just big enough for a bag to fit, and then just dumped the down into the opening as shown below. shaking the quilt helped distribute the down and make room for the next bag.
After I had dumped all 4 bags of down into the quilt, I used a vacuum to gather up any of the down plumes that had escaped while filling. (I used a rubber band to hold a couple layers of no-seeum netting over the end of the vacuum hose.) I then added this down to the quilt as well.
Finishing the quilt
After all of the down has been added, the last step is to close up the top edge. Pin the top together so that the hemmed edges are aligned. Stitch the parts together stitching on top of the hem stitching as shown below.
(I don't prefer a drawstring on the top edge of my quilts, but if one is wanted it could be easily added during this step.)

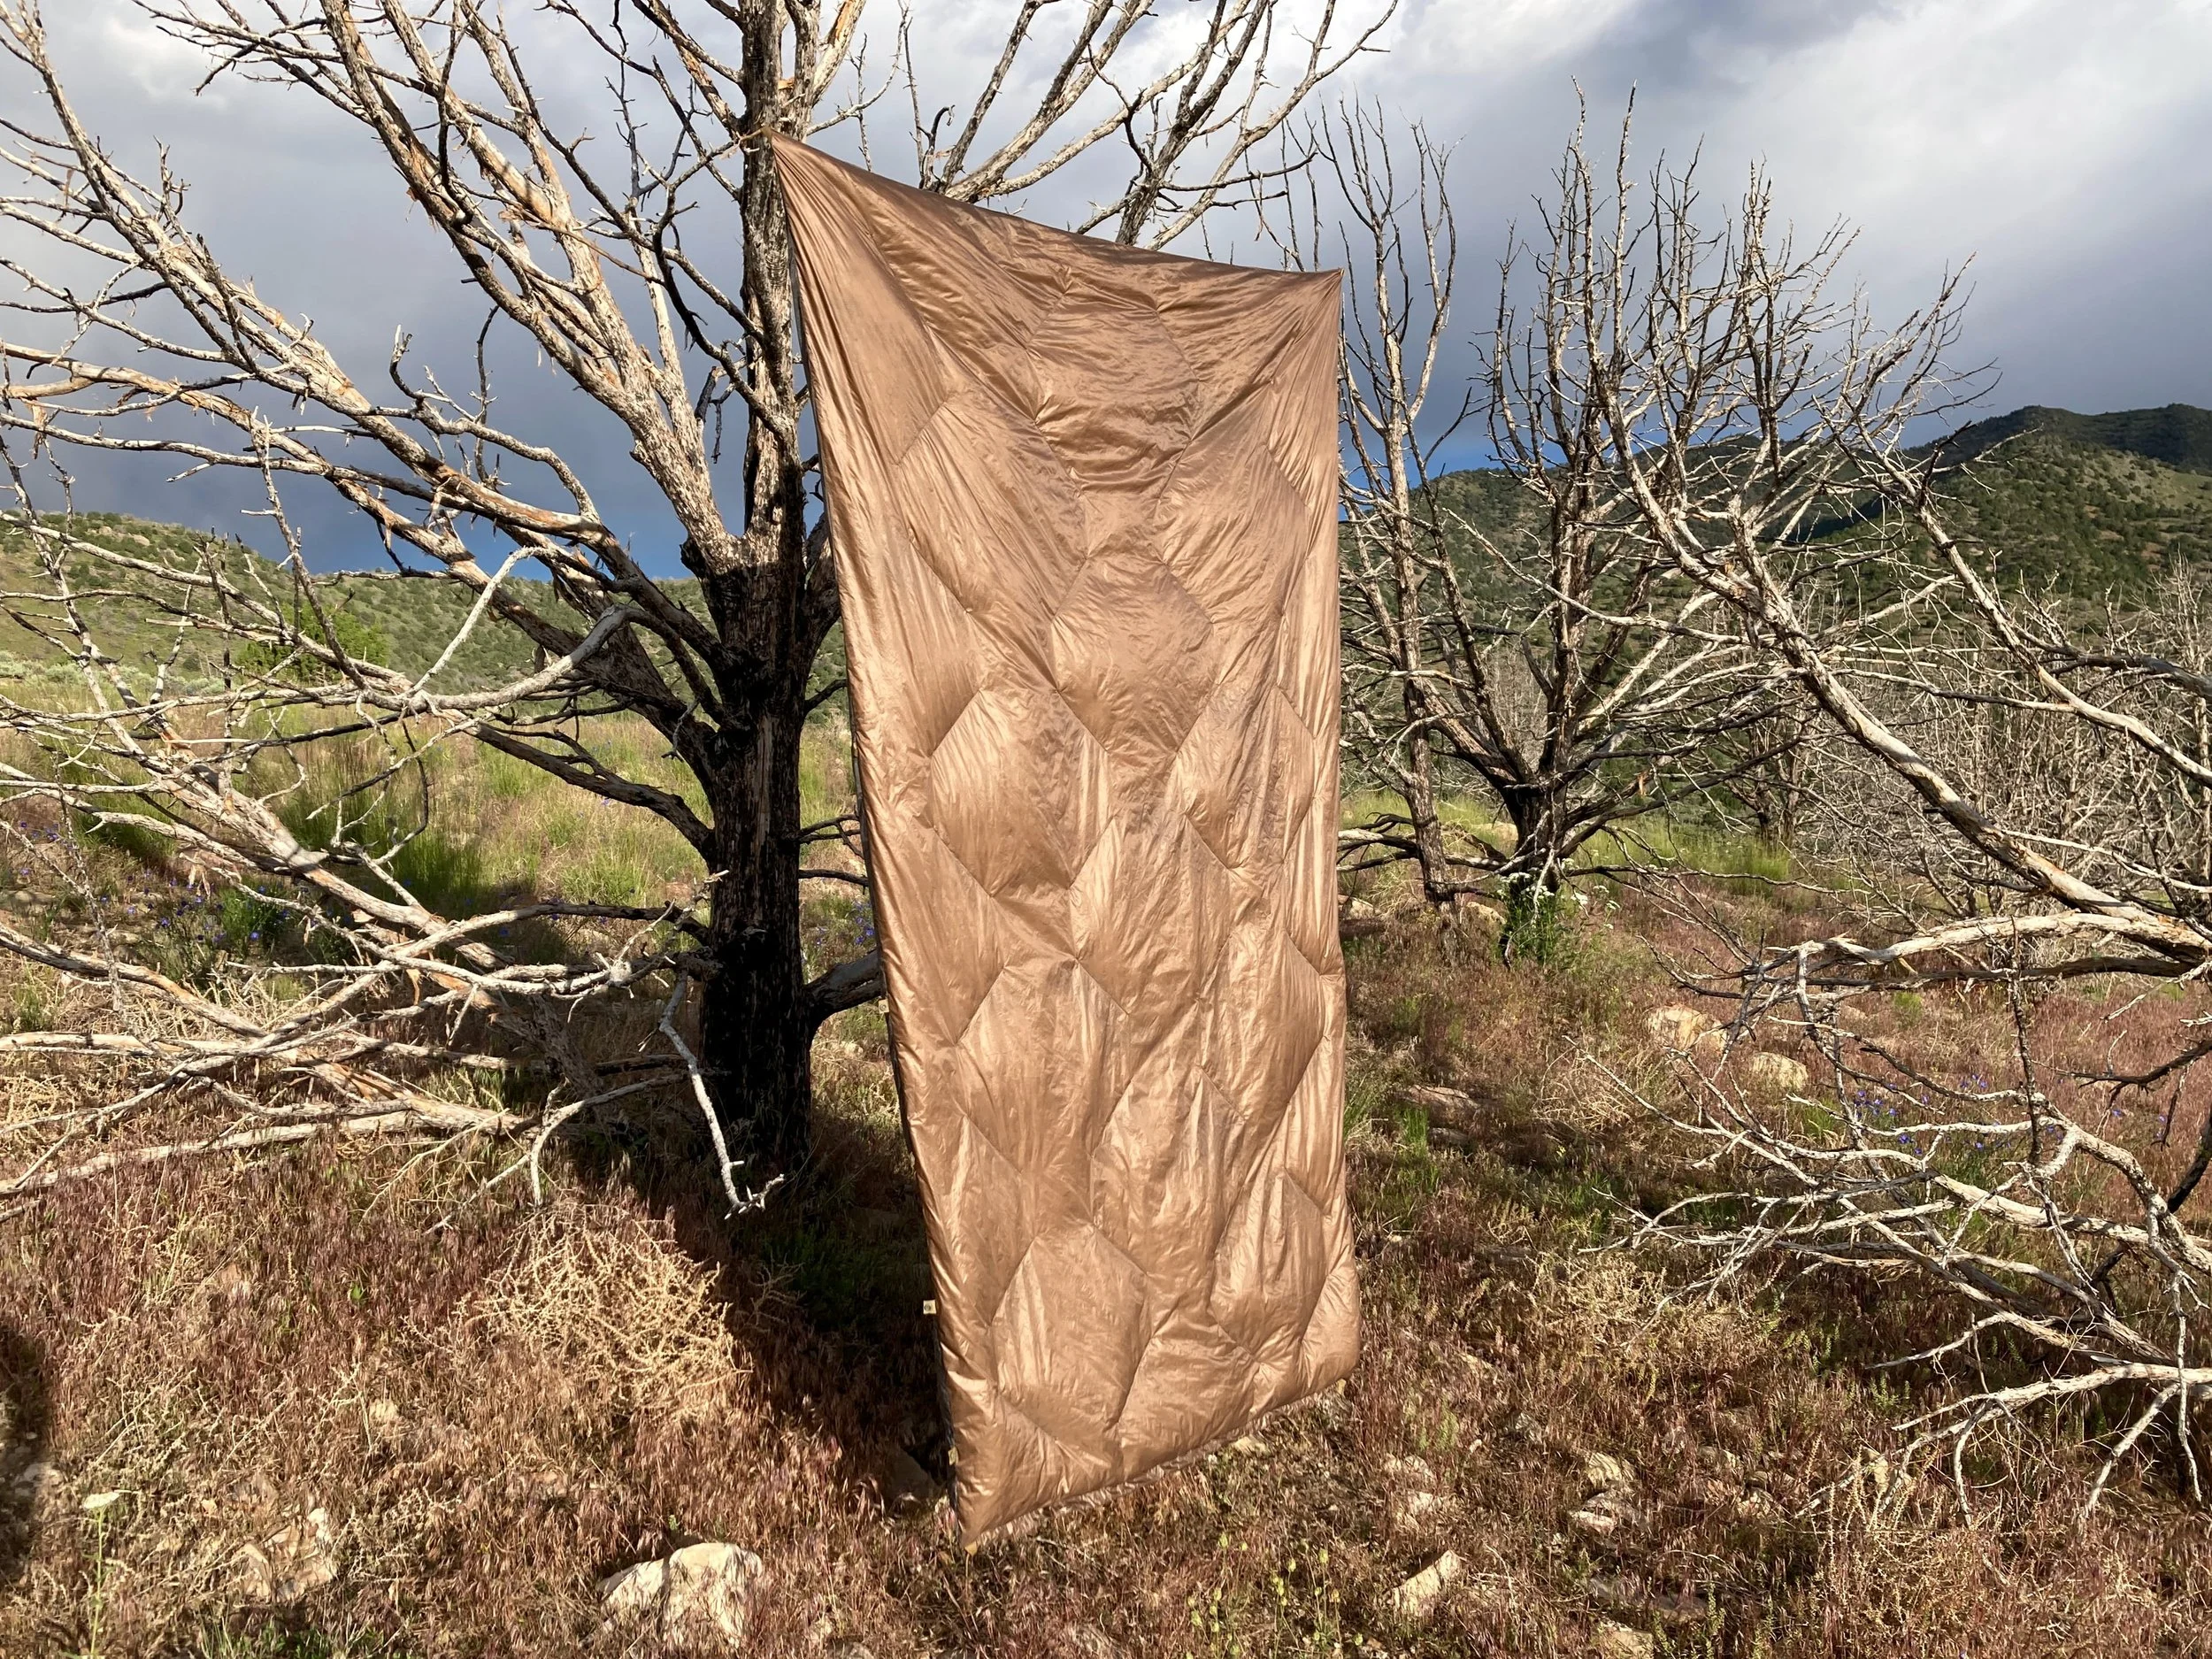
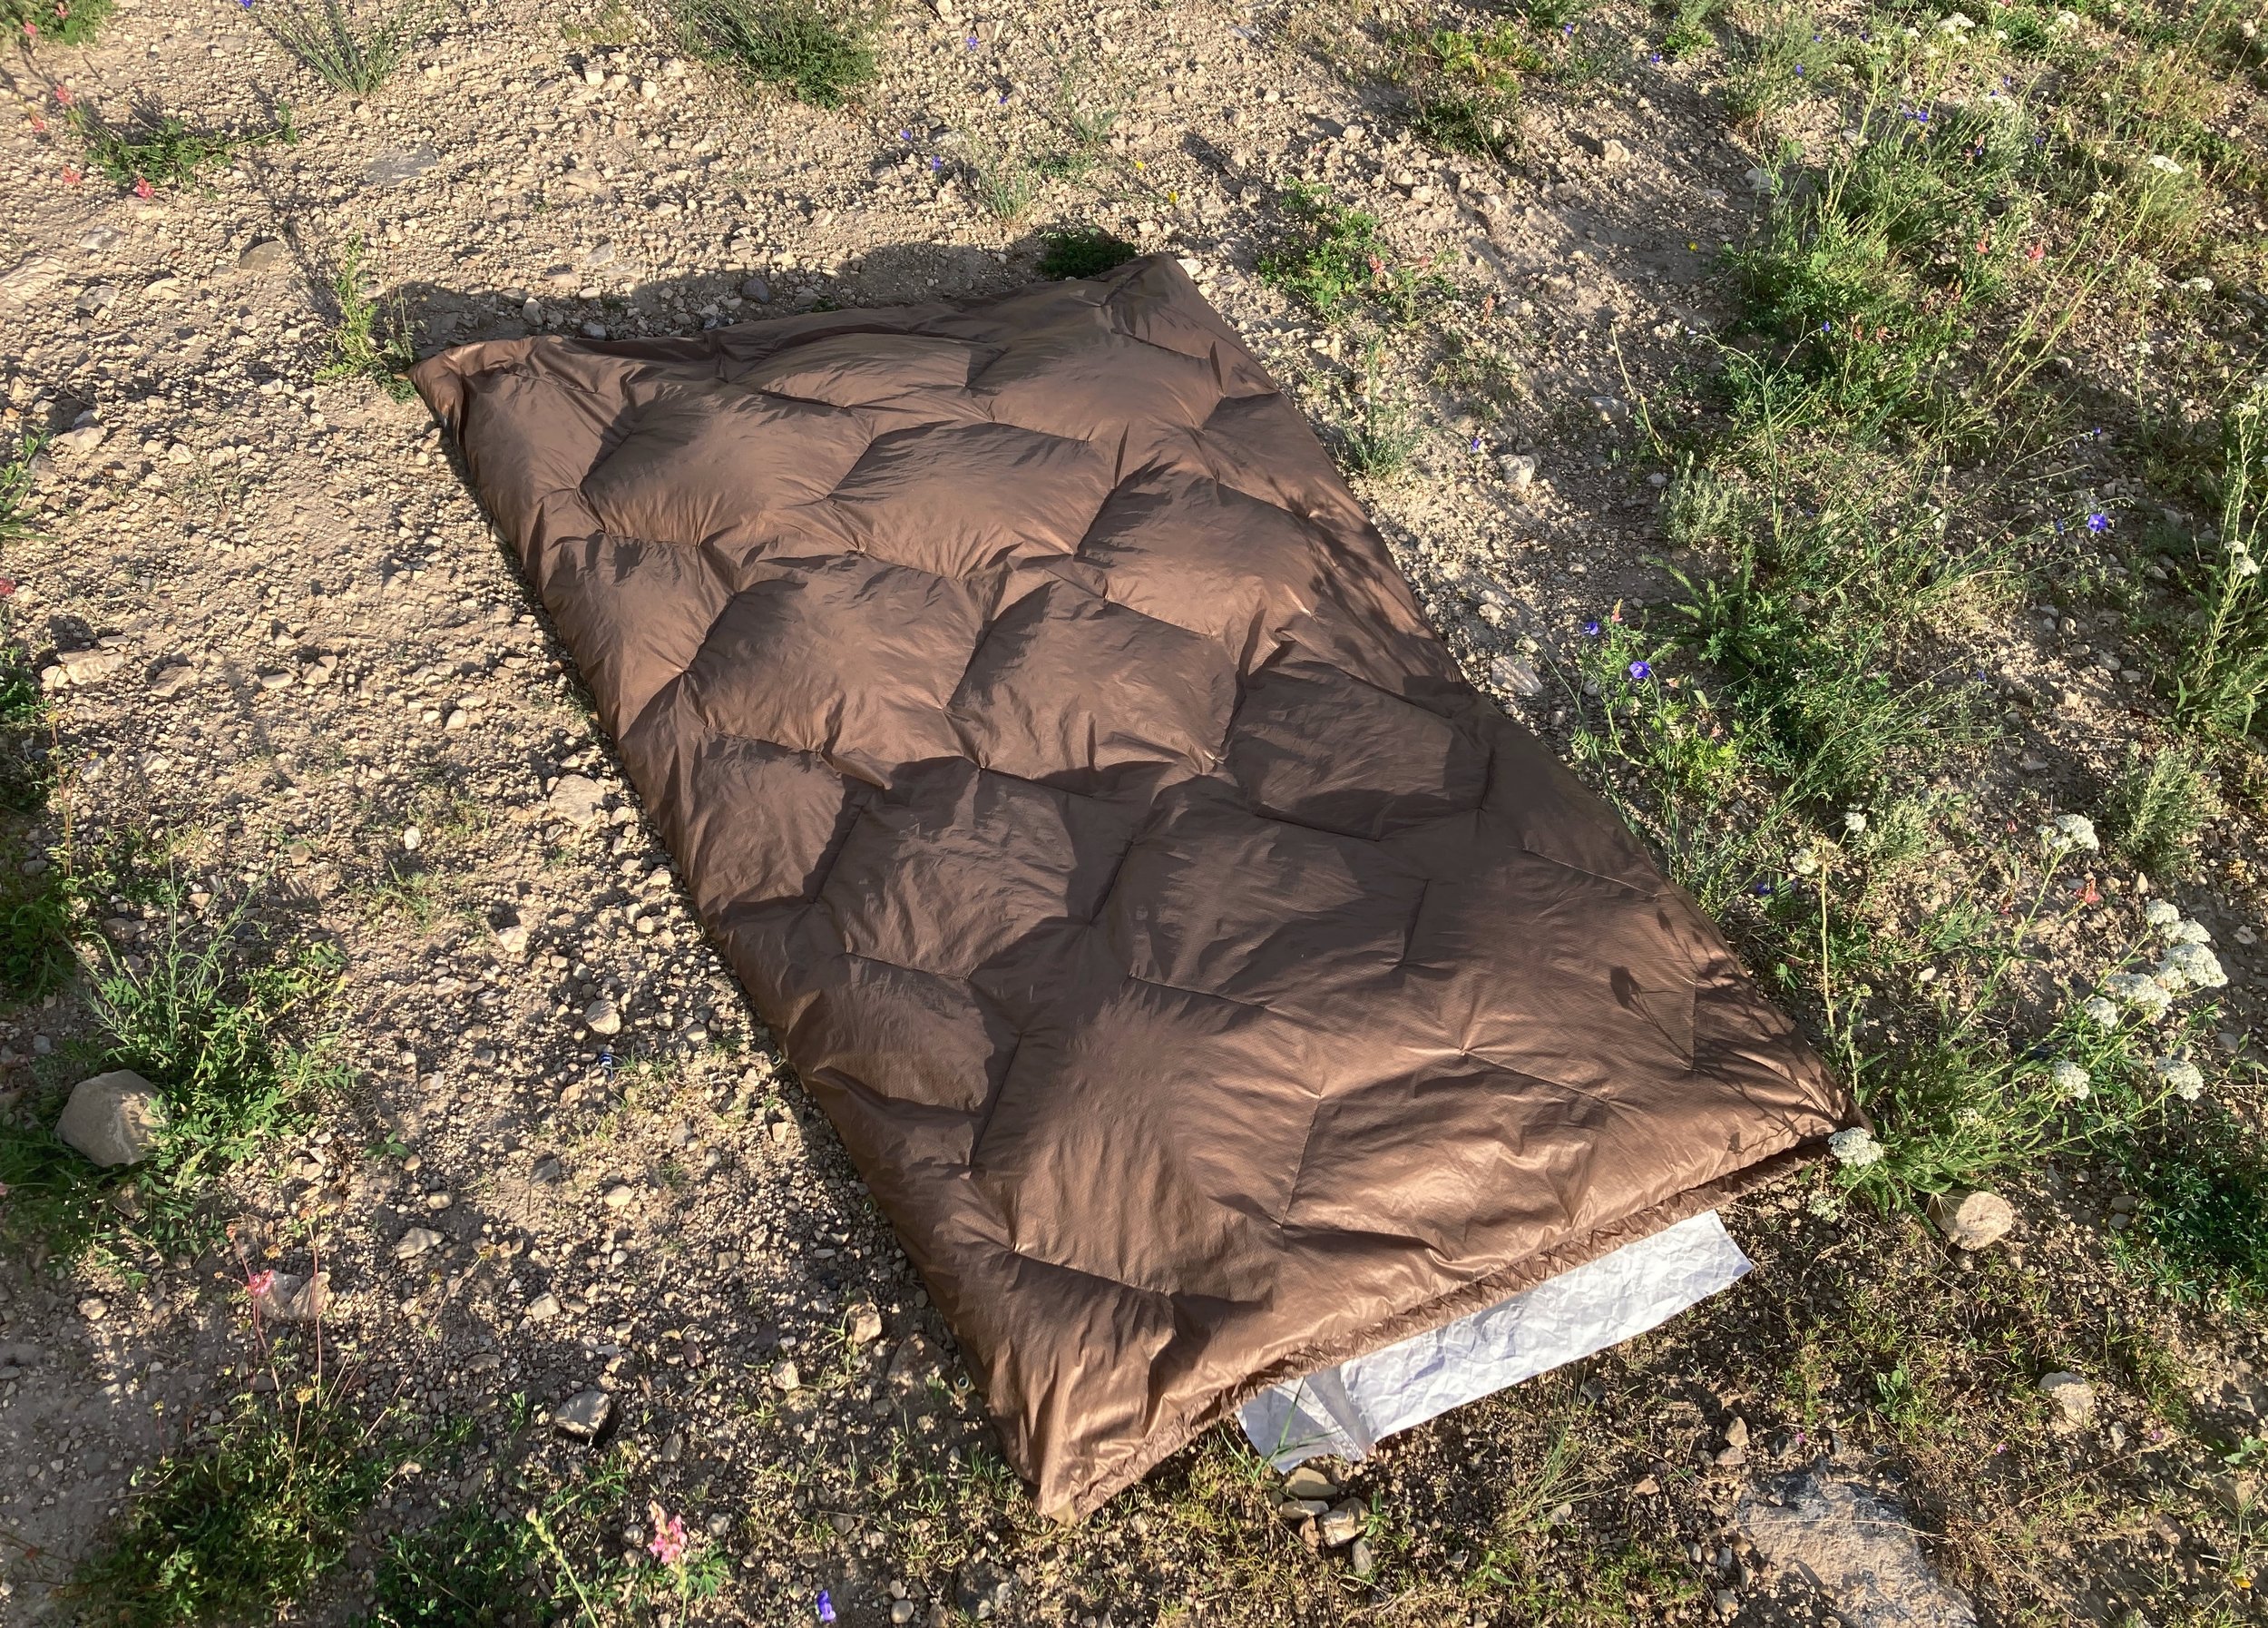
Finished quilt.
Final thoughts
The Karo Step method definitely made filling the bag easier, and I like the way the baffles look. I will probably use this method again on the next quilt I make. If I were to do anything different, I would use smaller boxes. I’ve noticed the down migrating a little bit near the top of the quilt where the boxes are close to 14”x 14”. In the future I would make them no larger than 12” x 12” and would consider going even smaller than that. But, overall I’m happy with the quilt, and I’m sure I’ll get some good use out of it.
Related products we recommend
The links above are affiliate links. As an Amazon Associate Stitchback earns from qualifying purchases