How to Make a Laminated Foam Frame Sheet
If you are making your own ultralight backpack and looking for a way to give it some structure without too much of a weight penalty, a laminated foam frame sheet is an interesting option. A laminated foam frame sheet is made of 2 pieces of foam that are glued together while curved. Once the 2 pieces are glued, they will retain that curve. This makes the foam fit more comfortably to your back. It is also a little more rigid and resists barreling better than a single, flat piece of foam.
This is still a lightweight frame best used with ultralight loads, and care must be taken when packing the backpack not to overwhelm the frame sheet. If you are looking for something a little more robust for you backpack check out our article “How to make a molded kydex frame sheet.”
Step 1
The first thing you will need is a mold that will be used to hold the foam in a curve while gluing. We go over all of the steps for determining the curve and making the mold in the article on kydex frame sheets. In fact the same mold can be used for making both a foam and kydex framesheet. This article won’t go over those steps again, so check out that article for that information.
Step 2
You’ll need to determine what shape to cut the foam. Measure the back panel of the backpack. (the side that touches your back when wearing.) Generally the frame sheet will be about .25” smaller than the size of the back panel. You want the foam to fit snugly in the pack. If you are making a backpack from a Stitchback pattern there will be a full size template for cutting the foam. If you are making the frame sheet for an existing backpack it can be helpful to cut out a test shape from some scrap cardboard to see how it fits. Some backpacks will have a sleeve for the frame sheet to slide into that may not be rectangular.
Once you have determined the shape, you will need 2 pieces of foam cut to that size. 1/4” thick EVA foam works well, and a firm higher density foam such as 74 kg/m³ works better than a soft squishy one.
Step 3
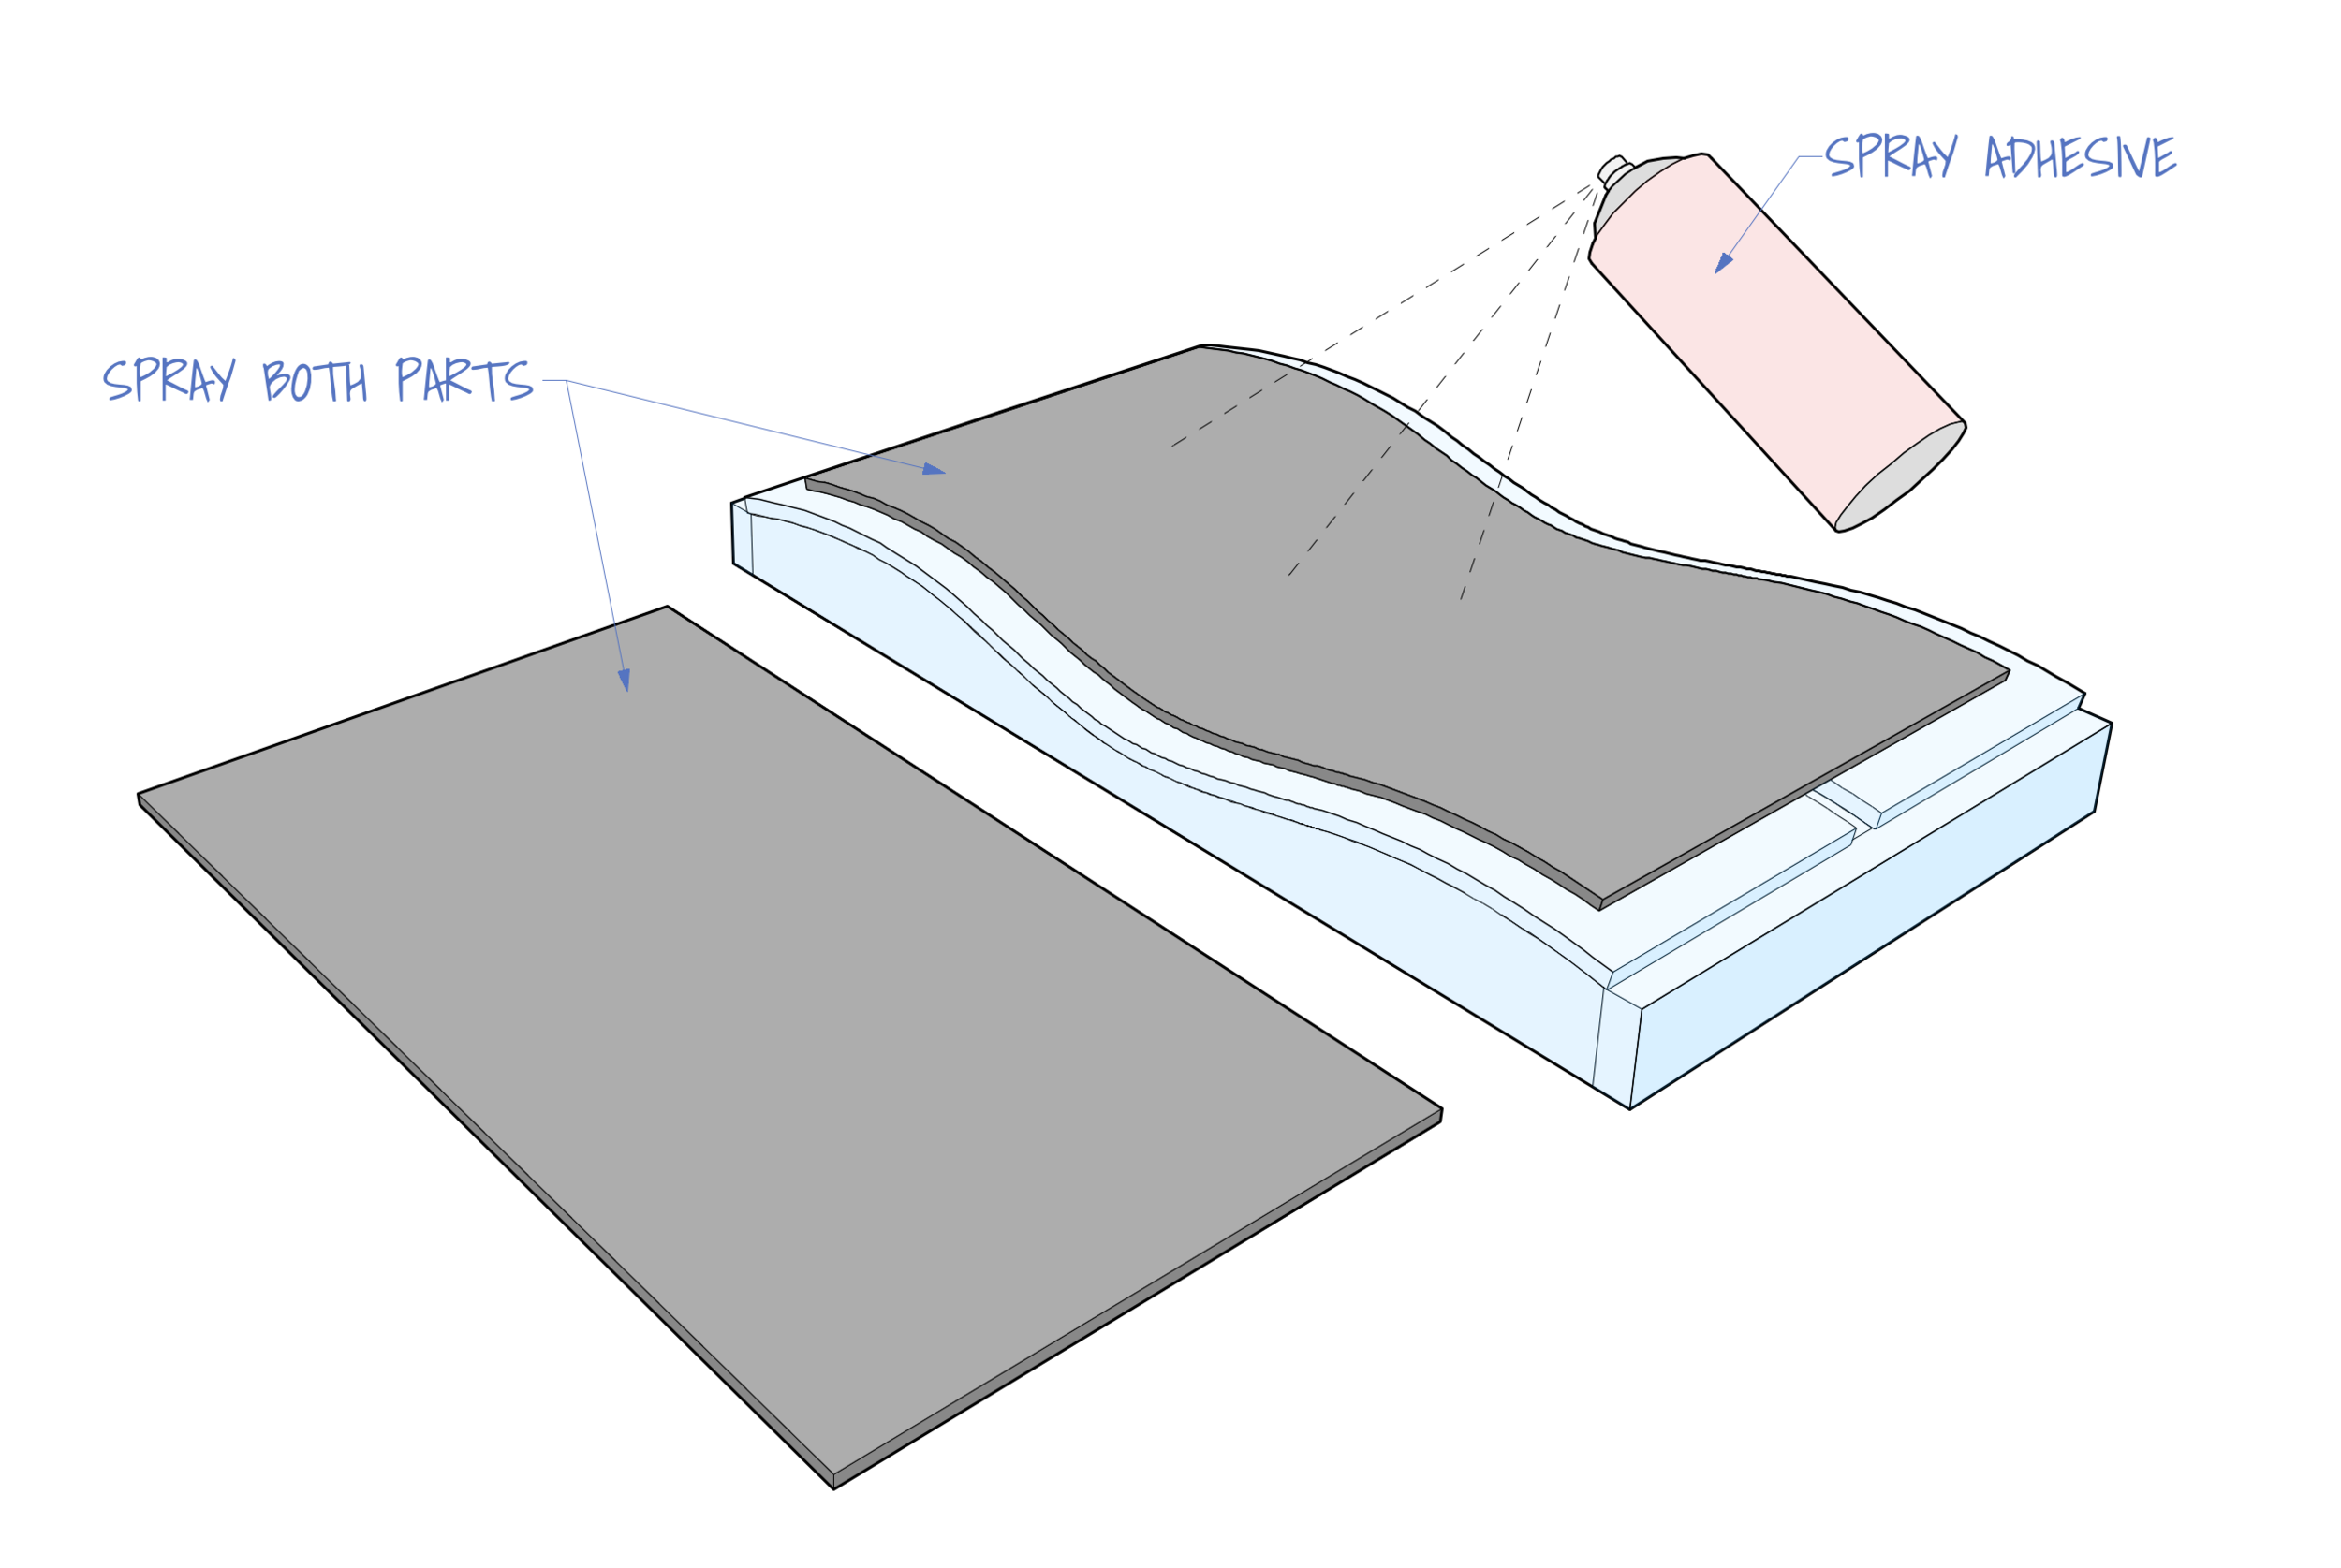
Use double sided scotch tape to stick the first piece of foam to the mold. Use small pieces of tape to hold the foam against the mold so that it follows the curve. You want to use just enough tape to hold the foam tight against the mold but not so much that it will be difficult to remove. If the shape of the foam has a top and bottom be sure it is taped to the mold in the correct orientation.

Step 4
Next spray the first layer of foam with spray adhesive. You’ll want to mask off the areas around the mold to avoid overspray. Spray one side of the second layer of foam as well. A spray adhesive such as “3m Super 77” works well with EVA foam. But other spray adhesives or even a brush-on contact adhesive such as barge could be used. Just be sure whatever glue you use is compatible with the type of foam you are using.
Step 5
Follow the instructions of the glue you are using. Once the glue has dried sufficiently align the 2 pieces of foam starting at the bottom. Press the second piece of foam onto the piece secured to the mold. You want the second piece of foam to follow the curve of the mold as well. Use a roller or your hand to press the 2 layers tightly together.

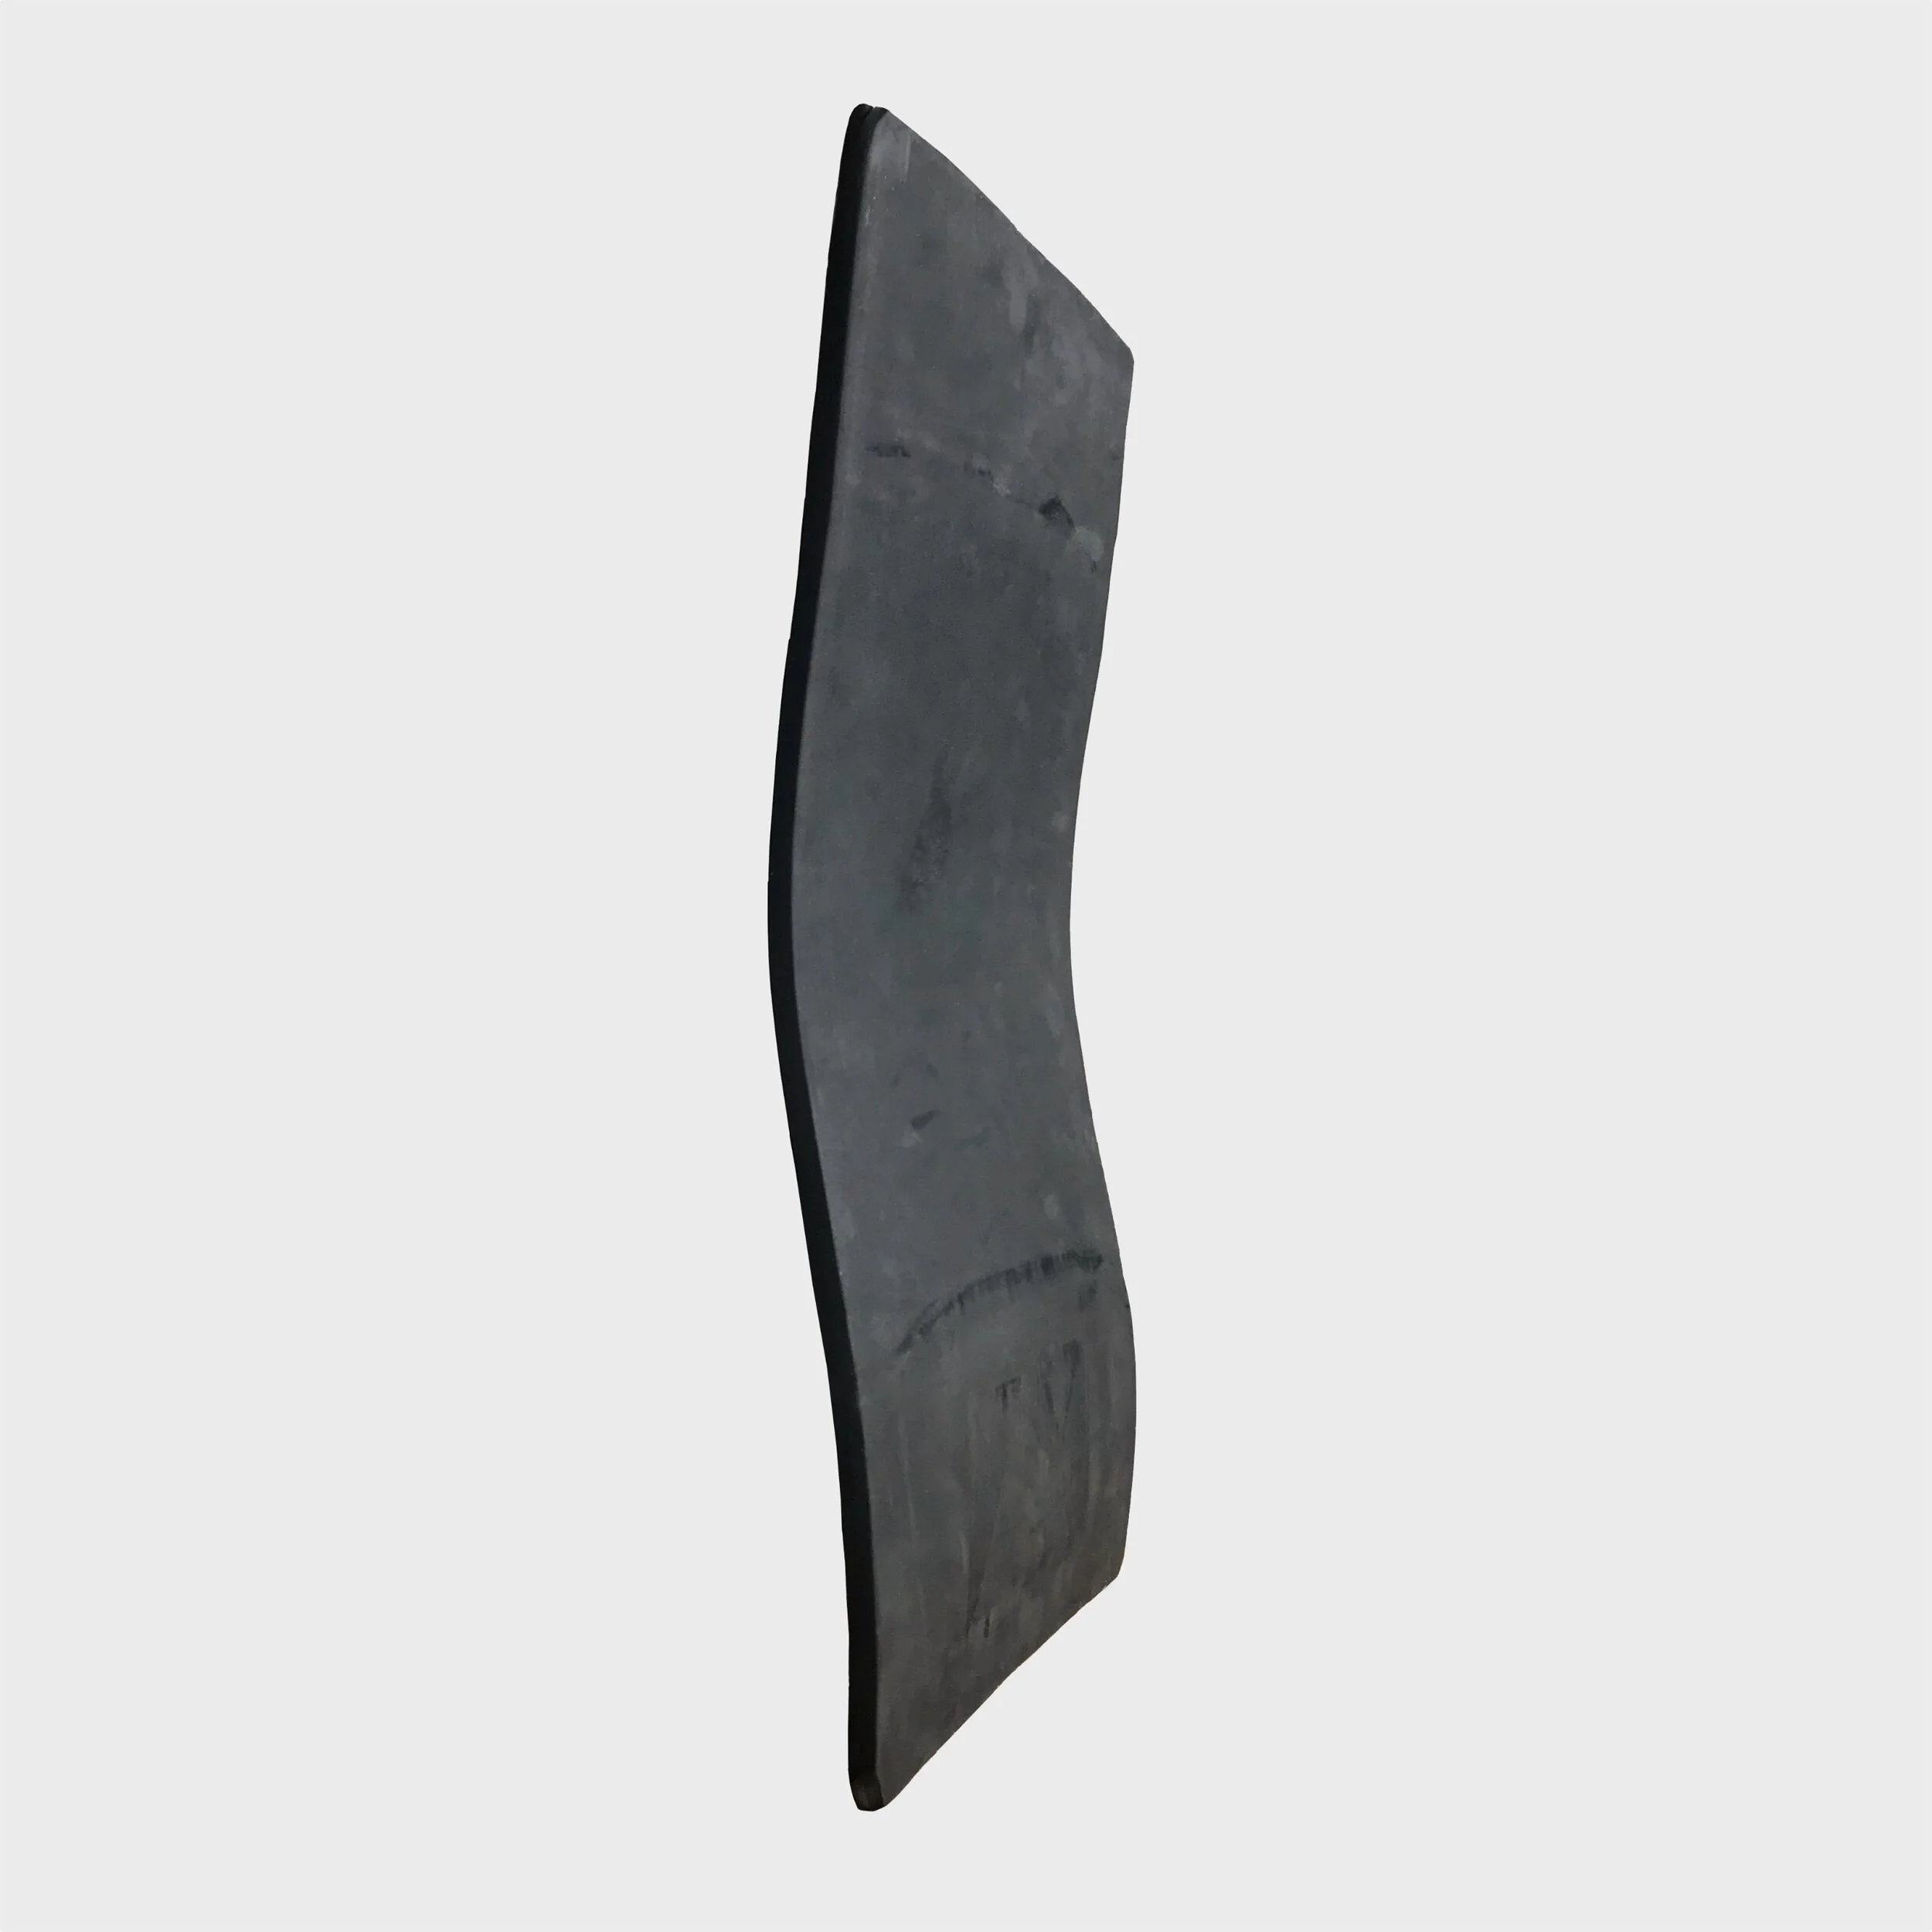
Once the glue has dried the foam can be removed from the mold. The foam should now retain the curve of the mold. The foam is still flexible but will return to this shape if allowed to. If there is mis-alignment on the edges they can be trimmed flush with scissors or a utility knife.
The frame sheet is now ready to be inserted into the backpack. Be sure to orient it correctly with the bottom down and the correct side against your back.